Client Types
A Client Type is an optional setting in a client profile that is used to categorize clients. For example, you might create Bronze, Silver, and Gold Client Types to categorize clients based on how long they’ve been doing business with you.
If a client is assigned a Client Type, a badge appears beside the client name in several areas of Meevo (you can configure the badge color from within in the Client Type definition).
![]()
Client Type badges appear in various areas of Meevo: on the appointment block within the Appointment Book and next to the client name in the client's profile, Appointment Editor, and Client Find results.
Once clients are assigned to Client Types, you can also:
- Create discounts that apply only to specific Client Types.
- Filter the Appointment Book by Client Type
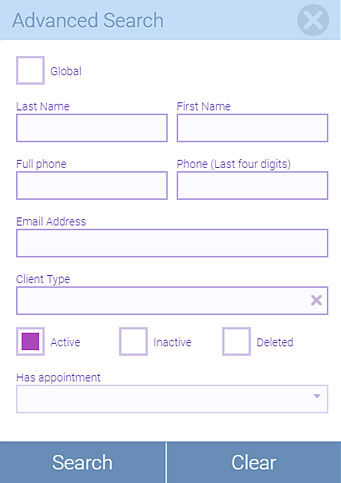
- Search for clients by Client Type in client search forms.
In a multi-location, who can create Client Types?
- When it comes to multi-location businesses, Client Types are different from most other items in Meevo in that only Central Office can create, edit, inactivate, or delete a Client Type.
- Locations are able to view and assign Client Types, but not make any changes to the Client Type definitions themselves.
- Central Office cannot assign Client Types to clients.
- Additionally, Central Office cannot exclude individual locations from accessing the item. When a Client Type is made available to locations, it becomes available to all locations of that Business Type.
|
Action |
Central Office |
Location |
|
Add (create) Client Type |
|
|
|
Edit Client Type |
|
|
|
Inactivate Client Type |
|
|
|
Delete Client Type |
|
|
|
Assign a Client Type in client profile |
|
|
How many Client Types can I assign to a client?
Each client profile can be assigned to one Client Type at a time.
Adding a Client Type
- From the Client Types search form, select Add New.
- Show Visual Indicator: Clients assigned to this Client Type will have a badge displayed next to their name in various areas of Meevo.
- If you selected Show Visual Indicator, specify the badge color using the color picker.
- When finished, select Save.
Assigning a Client Type to a client
A location can assign a Client Type to a client via their client profile.
Searching for clients by Client Type
- Type client into the Convobar, or go to Meevo > Data > Clients.
- In the search form, select Advanced Search.

- Select a Client Type and enter any other information to narrow your search.
- Select Search. Meevo displays a list of all clients who match the search criteria, including the defined Client Type.
Editing a Client Type
Note: Once an item is saved with a Business Type selected and the item is made available to locations, then the Business type cannot be changed to anything other than All Business Types.
- Locate the Client Type and select it.
- Select Edit, and make your changes.
- When finished, select Save.
Inactivating or reactivating a Client Type
When you inactivate a Client Type:
- Client profiles already assigned to this Client Type remain unchanged.
- It is no longer selectable from any forms or menus in Meevo.
- It can still appear in Meevo reports.
- It does not appear in Meevo search results unless Inactive is selected from the Advanced menu.
- If you inactivated the item in Central Office, the item becomes inactive in associated locations as well.
- Remember that only the owner (as determined by the Owned By field) of the item can inactivate or reactivate it.
To activate or inactivate:
- Locate and select the Client Type.
- Select Edit.
- Select the switch to toggle it to Active or Inactive.


- Select Save.
Deleting or undeleting a Client Type
When you delete a Client Type:
- Client profiles already assigned to this Client Type remain unchanged.
- It is no longer selectable from any Meevo forms or menus.
- It does not appear in Meevo search results unless Deleted is selected from the Advanced menu.
- It may still appear in Meevo reports depending on the report setup criteria.
- If you deleted the item in Central Office, the item becomes deleted in associated locations as well.
- Remember that only the owner (as determined by the Owned By field) of the item can delete or undelete it.
To delete or undelete:
- Locate the Client Type and select it.
- Select Delete or Undelete.
- If deleting, a confirmation message appears. Select Yes to complete the deletion.
- If undeleting, the form becomes active after you select Undelete. Select Save to finish undeleting.