Creating an Automation
The Automation feature lets you automatically send targeted emails to your audience based on actions that they’re taking (like beginning a membership or no-showing an appointment) and important milestones in their customer journey (such as birthdays). You can create workflows to send emails to your subscribers based on those actions and events.
For guidance on the types of automated emails we recommend, see our Automation Scenarios topic.
When do automated emails get sent?
Automated emails are sent at 3 am EST. If you wish to send an automated email at a different time, be sure to configure a Wait time for the automation.
To create an automation
Use this feature to set up automated campaigns, which send out emails automatically. This is great for events like birthdays, anniversaries, holidays, and “we miss you” campaigns. Automation can be referred to as the "set it and forget it" feature, as you should only have to configure this once.
For additional details, you can also review the Email Marketing Help Automation topic.
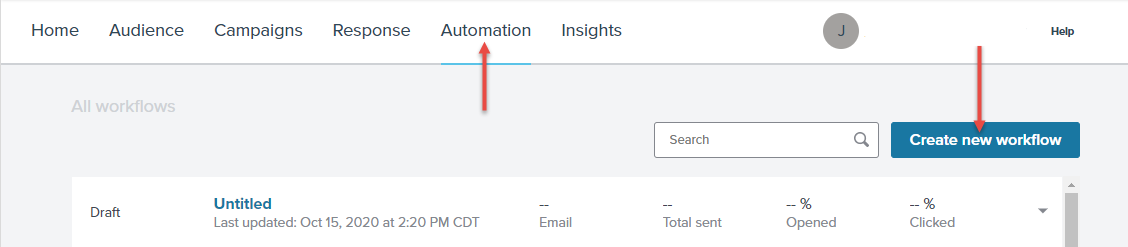
- Select Automation. The screen opens to your Workflow list by default. Select Create new workflow.
- Enter the Workflow name.
- Select the Audience.
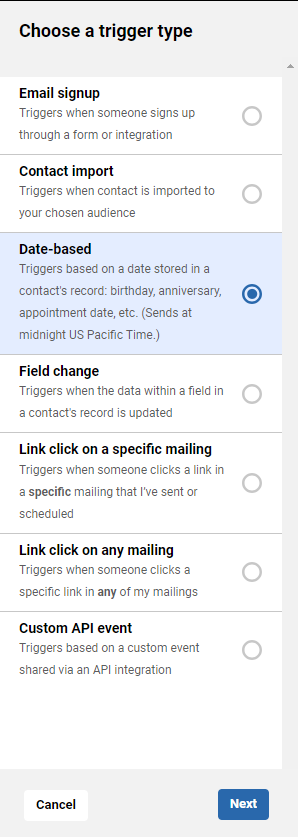
- Define the Trigger event. Select Date-based to trigger an email based on a contact’s record. Then, select Next.
Note: For workflows based on your client data in Meevo, select Date-based.
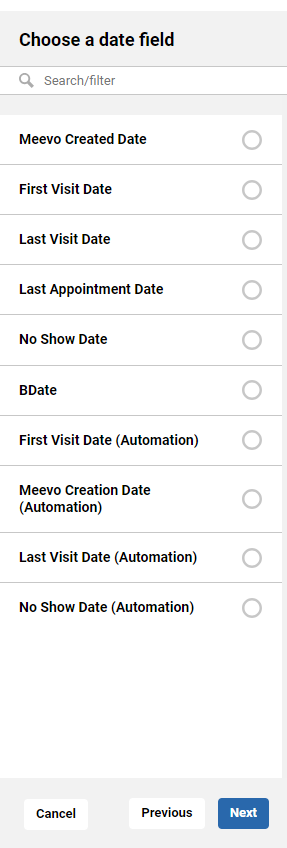
- On Choose a date field, select an event to trigger the automation.
- Select Next.
- Configure when the trigger event should occur.
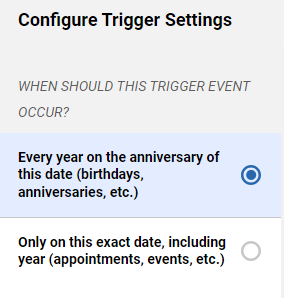
- Select Next, and then select Confirm.
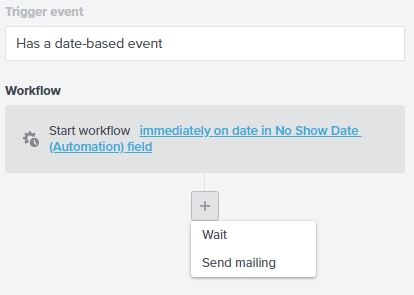
- Select the Add Action button (+), and then select Send Mailing. You can select the Start workflow hyperlink to specify exactly when the workflow should begin.
Note: Automated emails are sent at 3 am EST. If you wish to send an automated email at a different time, be sure to configure a Wait time for the automation (button shown above).
- Choose the Mailing you wish to send. The Review window will appear.
- Confirm the Subject, From Name, and From Email.
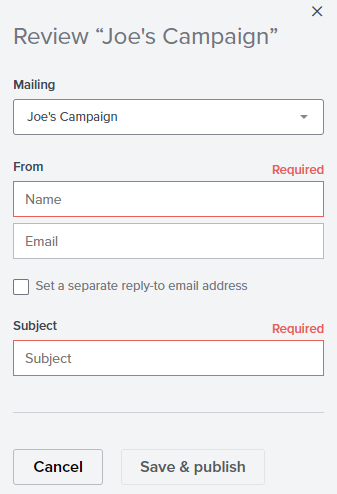
- When finished, select Save & publish.
- (Optional) Add additional branches to build out your automated campaign.
- Toggle the Campaign to Active. This will turn on your automation.
- Select Save Workflow.