Installing and Setting Up a Star USB Printer
A USB receipt printer connects directly to your computer, so it does not need to be added in Meevo. When you connect the USB printer to your computer, you can make it your computer's "default printer." This means that when you select System Printer in Meevo, you are selecting the USB printer.
Install the printer
- Read our Meevo System Requirements and Supported Devices to ensure your computer and devices are compatible with Meevo.
- The TSP100futurePRNT Hardware Manual contains important information and details from the manufacturer that are not discussed in this topic. MSI recommends you read your device documentation before proceeding with the installation.
Star USB printer installation instructionsStar USB printer installation instructions
- Place the printer in the desired location in your business. Make sure a power source (outlet, surge protector, etc.) and the computer using Meevo are close by; these are needed to hook up the printer.
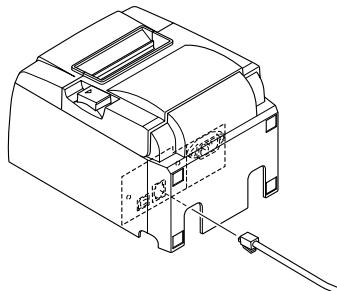
- Use the image below and the TSP100futurePRNT Hardware Manual to familiarize yourself with the ports on the back of the printer. All ports and connectors are located on the back of the printer.
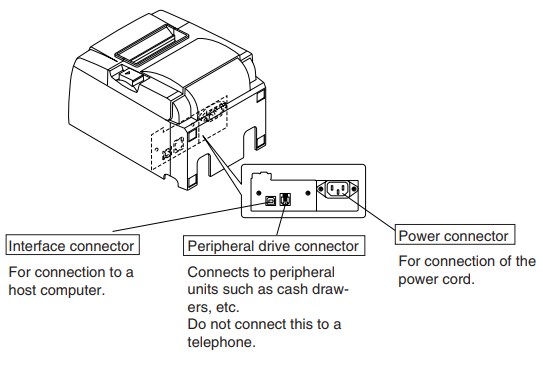
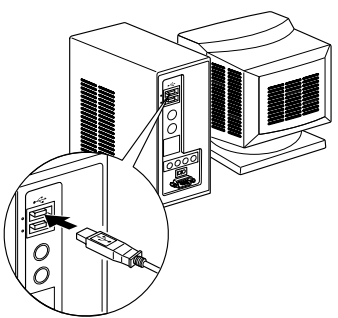
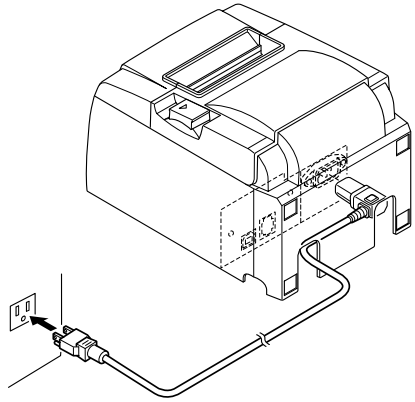
- Connect the USB connector cable from the printer's interface connector to a USB port on your computer.
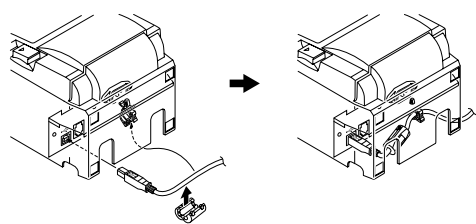
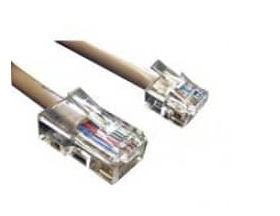
- If you are using a cash drawer, connect the cash drawer cable (shown below; its connector ends look like a telephone cord's) from the peripheral drive connector on the receipt printer to the cash drawer.
- Connect the printer's power cable from the printer's power connector to a power source.
- Follow the setup instructions below according to your Operating System.
Setting up the printer on Windows 7, Windows 8, or Windows 10
- Open Devices and Printers.
- Locate the receipt printer in the list of devices under Printers.
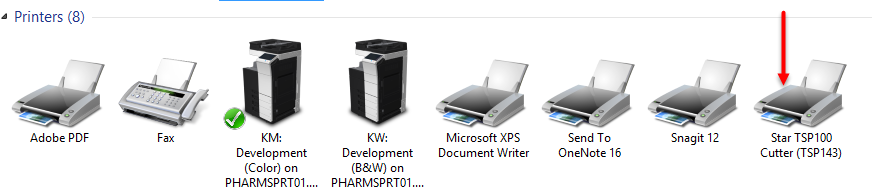
If your printer appears under Unspecified or is not showing in the device list, you need to update the printer's driver. Download your printer's latest driver here: Star driver downloads
- For Windows 7, driver 5.5 or later is supported.
- For Windows 8.1 and Windows 10, driver 7.3 or later is supported.
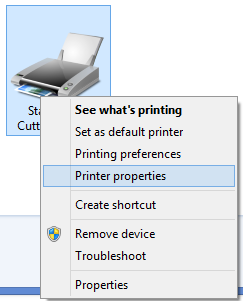
- Right-click the printer and select Set as default printer. A green check appears beside the printer. This means that when you select System Printer in Meevo, you are selecting your USB printer.
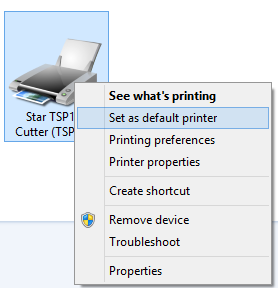
- Right-click the printer again and select Printer properties.
Note: The browser will remember these settings, but these settings may be lost after clearing your cache or logging in as a different user. Should that occur, configure the settings in this topic again.
- Select Device Settings and make the following changes:
- Change the Form To Tray Assignment FRICTION setting to 72mm x 200mm.
- Change the Page Cut Type to Partial Cut.
- Change Peripheral Unit Type to Cash Drawer.
- Change Peripheral Unit 1 and Peripheral Unit 2 to Document Top. This opens the cash drawer prior to the receipt being printed.
Note: Select Document Bottom to open the cash drawer after the receipt prints.

- Select Apply.
- Next, select the Advanced tab > Printing Defaults > Paper/Quality tab > Advanced and make the following changes:
- Change Paper/Output Paper Size to 72mm x 200mm.
- Change Advanced Printing Features to Disabled.
- Change Halftoning to Super Cell.
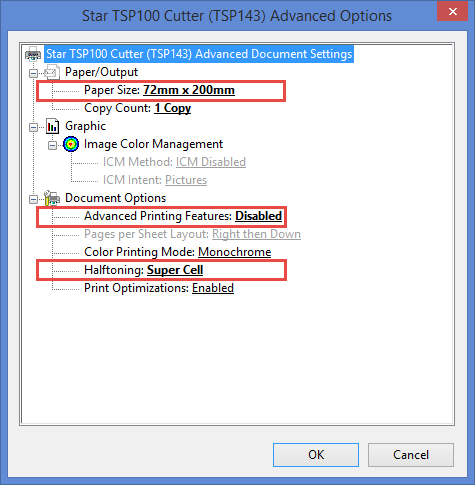
- Select OK three times to close all open printer configuration windows.
- In Meevo, change your default printer to System Printer.
- While on any Meevo page, press Ctrl + P on the keyboard to bring up the browser's print dialog. These settings are browser-specific and must be configured for each browser that will use Meevo. Choose the following settings if they are not selected already:
- Layout: Portrait
- Color: Black and white
- Paper Size: 72mm x 200mm
- Margins: Minimum
- Scale: 100 (note that as a matter of preference, you may prefer a scale of 80)
- Options: Headers and Footers should be selected
- It is recommended that you execute a test transaction in Meevo and test the receipt printer before using it in your day-to-day operations.
Setting up the printer on MacOS
Note: The browser will remember these settings, but these settings may be lost after clearing your cache or logging in as a different user. Should that occur, configure the settings in this topic again.
- Download your printer's latest driver here: Star driver downloads
- Verify that your Mac has the Code39 font installed. This font is required for barcodes. If your system does not have this font, download and install it.
- On your computer, open Printers and Scanners and locate the printer.
- Right-click the printer and select Set as default printer. This means that when you select System Printer in Meevo, you are selecting your USB printer.
- Open Chrome as your browser, and on the keyboard, press Command + P.
- Make the following changes on the Chrome printer dialog:
- Layout: Portrait
- Paper Size: 72mm x 200mm
- Margins: Minimum
- Scale: This can be anywhere from 100-120.
- Options: Headers and Footers should be selected
- It is recommended that you execute a test transaction in Meevo and test the receipt printer before using it in your day-to-day operations.