Hiding Potentially Sensitive Data in Meevo
During the course of a normal day, a business can enter a great deal of client and appointment data into Meevo. Depending on your business, some of this data may contain sensitive or private details that clients do not want shared, not even among your employees. To that end, Meevo provides you with the ability to secure or hide a number of features and fields that may contain such data.
Note: The following is a list of suggestions that can hide potentially sensitive information in Meevo. Regardless of whether you implement all, some, or none of the following suggestions, it's important to note that it is the responsibility of the business to ensure proper security and access in Meevo. If you have any questions about securing Meevo, please contact our Business Support team at 973-402-8801.
Client Profiles
Set Client Notes to "Private"
When a Client Note is marked Private, it can only be viewed from Clients > Notes.
You can control who can manage private Client Notes via the Security Administration keys under Data > Client > Notes; these keys control the adding, editing, deleting, and viewing of Private Client Notes.
Set Visit Note Types to "Private"
When a Visit Note Type is marked Private, all Visit Notes of that type can only be viewed from Clients > Visit Notes. Private Visit Notes will never show up on reports.
You can control who can manage private notes via the Security Administration keys under Data > Client > Visit Notes; these keys control the adding, editing, deleting, and viewing of Private Visit Notes.
Hide Images and Fields with Sensitive Information
Consider hiding the following items in a client's profile that may display sensitive information. In Security Administration, all of these keys are found under Data > Client.
- Hide birthday and anniversary fields, which are found in the Sensitive Information section. The security key is Main > Birthday/Anniversary.
- Hide the Image Gallery tab, as this tab may contain photos of clients (before and after, etc.). The security key is Image Gallery.
Services
Configure a Service to Appear "Private" in History
A service can be configured to appear as "private" (masked) in a client's transaction and appointment history. To be private, the appointment service must be checked out, cancelled, or no-showed.
- In a service definition, enable Show as PRIVATE when viewing history.
- In Security Administration, make sure the key Client > History > View Private Services is set to Deny.
Appointments
Book Anonymous Clients in Appointment Book
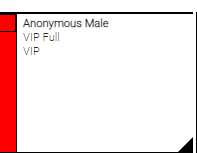
You can discretely book appointments for clients by booking the client under "anonymous." In the Appointments section of Business Preferences, enable Show Anonymous Client Option in Appointment Editor. Services booked for Anonymous Clients can still be tracked and reported on, but the data is not tied to a specific client profile.
Restrict access to the Appointment Book by Security Role
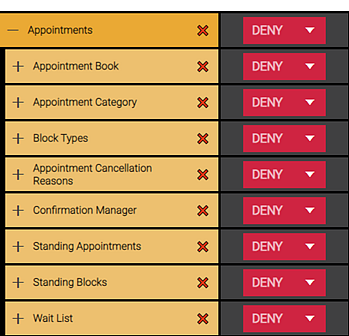
It may be desirable to restrict access to the Appointment Book and other areas for certain roles. You can do this in Security Administration by applying Deny permissions to the appropriate Appointment keys for a given Security Role. This security configuration can protect sensitive appointment data from being viewed by unauthorized users.
Restrict access to the Employee View in Appointment Book
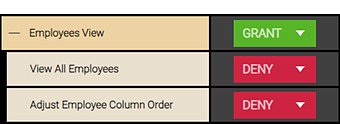
For those employees who do have access to the Appointment Book, you can restrict them from seeing other employee's columns (and therefore appointments) by setting the following Security Administration key to Deny: Appointments > Appointment Book > Employees View > View All Employees.
Hide Next Appointment from Receipt
In the Receipts section of Business Preferences > Register, disable Print the client's next appointment on receipts (if you are a multi-location, this option ends with regardless of location) to hide potentially sensitive service information from the client copy of a receipt. Note that private services never appear on receipts.
Hide Visit Notes and Transaction History on Work Tickets
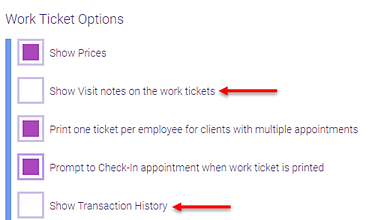
There are settings in the Work Ticket Options section of Business Preferences that control what appears on a work ticket.
- Disable Show Visit notes on the work tickets to hide potentially sensitive Visit Note information from work tickets. If you are a multi-location, disable Show Visit Notes from All Locations on Work Ticket as well. Private Visit Notes are independent of this setting and never appear on work tickets.
- Disable Show Transaction History to hide the client's transaction history, which could include sensitive services or retail details, from work tickets. Note that private services are independent of this setting and never appear on work tickets.
Client Selection Export
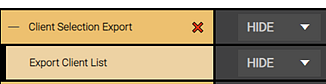
Client Selection Exports can include sensitive client information. You can prevent client exports by going to Security Administration and setting the Management > Client Selection Export keys to Deny or Hide.
Docs & Forms
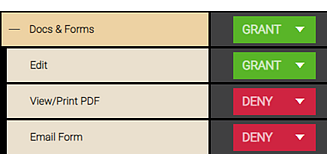
To prevent unauthorized users from viewing sensitive client information that may appear on forms, you can lock down the ability to view those forms by going to Security Administration and setting the Data > Client > Docs & Forms > View/Print PDF and Email Form keys to Deny or Hide.
User Defined Fields
Custom tabs, which can be created through User Defined Fields, should also be secured, as these areas can contain sensitive client details. UDF keys can be found in the following areas of Security Administration:
- Data > Client > Custom UDF Tabs
- Data > Employee > Custom UDF Tabs
Depending on your business model, you may also prefer to lock down the remaining UDF keys:
- Data > Services > Custom UDF Tabs
- Data > Product > Custom UDF Tabs
Reports and Report Scheduler
We recommend that you review and evaluate each report to determine which are appropriate to expose to users and which aren't. In Security Administration, report keys are found under Reports, and Report Scheduler keys are found Management.
Email Marketing Powered by Emma
Similar to reports, Email Marketing is a feature that you should evaluate to determine whether it's appropriate to allow users access to the Emma portal. In Security Administration, the Email Marketing Edit key controls the ability to use the Sync toggle. Email Marketing keys can be found under Marketing.