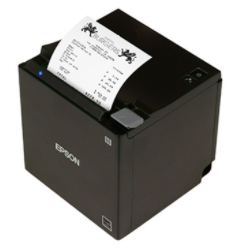
Installing the Epson TM-m30II-h Receipt Printer
Before you begin
- Read our Meevo System Requirements and Supported Devices to ensure your computer/devices are compatible with Meevo.
- The TM-m30II-h User Manual contains important information, images, and details from the manufacturer that are not discussed in this topic. MSI recommends you read this documentation before and during the installation.
Important: The IP address for a network receipt printer must be static and unique to that printer. Contact your network administrator to ensure that your printer's IP address will not change.
Before you install the printer
Before installing the printer, we recommend reading over the following information:
- Check items included with the printer: Identify the components and items that are included with the printer: 58-mm width paper guides, Manuals, Roll paper, AC adapter, AC cable, and the Power switch cover.
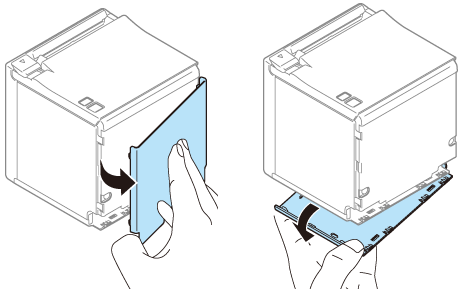
- Decide on an eject position: You can select whether to eject paper from the top or from the front of the printer. The paper eject position can be changed by switching attachment positions of the rear cover and the bottom cover. You don't have to do this now; it can be done upon completion of Step 1: Hook up the printer.
- Consider which paper width you'll use: You can change the paper width from 80 mm to 58 mm by installing the included 58-mm roll paper guides. This should be done after installation of the printer is complete. Note that if you change the paper width, you will need to set the new paper width using the printer's "software setting mode," as described in the TM-m30II Technical Guide.
Step 1: Hook up the printer
Some steps below contain links to the TM-M30II-h User Guide. We highly recommend you follow those links and review the content on those pages, as there may be supplemental details and images that are not covered below.
- Place the printer in the desired location in your business. Make sure a power source (outlet, surge protector, etc.) and network Ethernet port are close by; these are needed to hook up the printer.
- Remove the rear and bottom covers. Place your finger on the lip of each cover and pull away to pop them off the printer.
- Use the image below and the TM-m30II-h User Manual to familiarize yourself with the ports on the printer. For this installation, you will be using the 24V power and the 10BASE-T/100BASE-TX (Ethernet) port and, if applicable, the drawer kick-out connector (shown on the right).
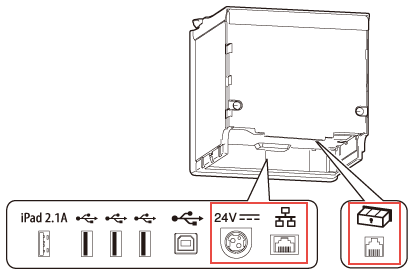
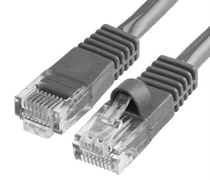
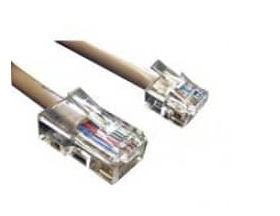
- Connect the Ethernet cable (shown below; its connector ends are wider than a telephone cord's) from the Ethernet port on the receipt printer to an Ethernet port that is connected to your network.
- If you are using a cash drawer, connect the cash drawer cable (shown below; it has two different-sized connector ends) from the receipt printer's drawer kick-out port to the cash drawer.
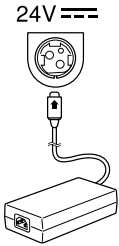
- Ensure that the receipt printer power switch is in the "off" position, and then connect the power block and cable to the 24V port on the receipt printer. Do not yet connect the power block to a power source.
- Attach the covers in your desired configuration, taking care to route the wires through the gap in the cover.
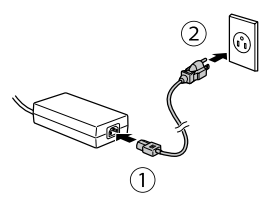
- Connect the power block to an outlet.
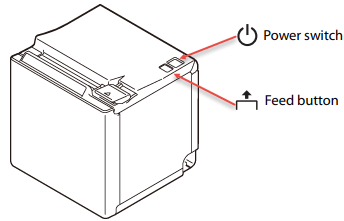
- Press and hold the Feed button on the printer's control panel while simultaneously toggling the power switch to "on." The startup or "boot" process begins when the Paper light on the device begins flashing. At this point, you can release the Feed button and allow the device to finish booting.
- Shortly after releasing the Feed button, the device will print an initial diagnostic receipt. This receipt may be fairly long in length. We recommend saving this receipt for reference, though it will not be needed for this setup.
- After the diagnostic receipt prints, the Paper light will continue to flash. Wait 1 to 2 minutes for another shorter receipt to print.
Important! This receipt contains network information that you will need for several upcoming steps.
- Next, type the printer's IP address into a browser, with /webconfig at the end of the address. The address should look something like this:
192.168.x.y/webconfig - Log in using the default credentials provided with the printer. For most Epson printers, these credentials are username: epson and case-sensitive password: your printer's serial number
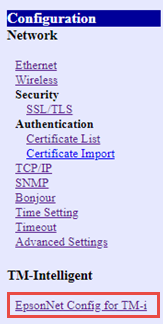
- Once logged in, from the left pane, select the EpsonNet Config for TM-i link under TM-Intelligent.
- In the EpsonNet Config for TM-i screen, select Printer under Device Admin.
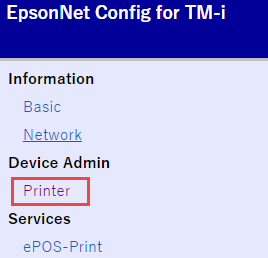
- Under Printer List, change the Device ID to something unique that identifies this printer in your network.
Important! Make note of this ID, as you will need it when adding the printer in Meevo in later steps. The Device ID in the Epson Printer Utility must match the Device Name in Meevo.

- Back in the EpsonNet Config for TM-I screen, select ePOS-Print under Services.
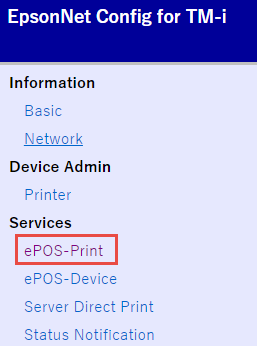
- In the ePOS-Print Settings screen, make sure Setting is set to Enable.

- Finally, at the top of the EpsonNet Config for TM-i page, select Apply & Restart.

- After the printer restarts, move on to Step 2: Choose a setup mode below.
Step 2: Choose a setup mode
Now that your receipt printer is connected to your network, the next step is to choose how you'll set up the printer on your computer or device. With networked printers such as this one, there are two ways you can set it up. Meevo Help covers all steps for each setup type.
Trust Mode (recommended)
In Trust Mode, you will install an SSL certificate on each Epson receipt printer and on each computer or device that will be using Meevo. Once installed, the SSL certificate tells your operating system that the printer is a trusted source. It ensures that Meevo and the receipt printer will communicate on-demand, when you need them to. Millennium Systems International recommends creating your own SSL certificate through the receipt printer's web interface, and then installing the certificate on each computer/device that will be using Meevo.
Benefits:
- Printing from Meevo is seamless; there is no need to always have a "printer connection" window minimized, as you would if you were using Connection Window Mode.
- After setting up the SSL and establishing trust between the printer and Meevo, there are no daily steps needed (unlike Non-Trust Mode).
Drawbacks:
- Requires you to create a self-signed certificate in the printer utility and to install that certificate on each computer or device that will be using Meevo, so of the two options, this one has more setup steps.
Note: If performing any of the steps below, it is recommended that you log in as a Local Administrator first. This ensures that non-admin users will have access to the SSL being installed.
- Make sure you have the receipt that has the printer's IP address (printed during installation).
- Type the printer's IP address into your browser, with /webconfig at the end of the address. The address should look something like this: 192.168.x.y/webconfig
- Log in using the default credentials provided with the printer. For most Epson printers, these credentials are username: epson and case-sensitive password: your printer's serial number. If epson does not work as your password, try your printer's serial number.
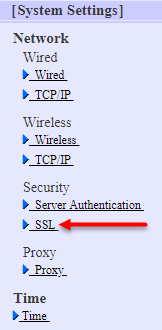
- A screen similar to the one below appears. Select the System Settings tab in the bottom-left, just above Admin Settings.
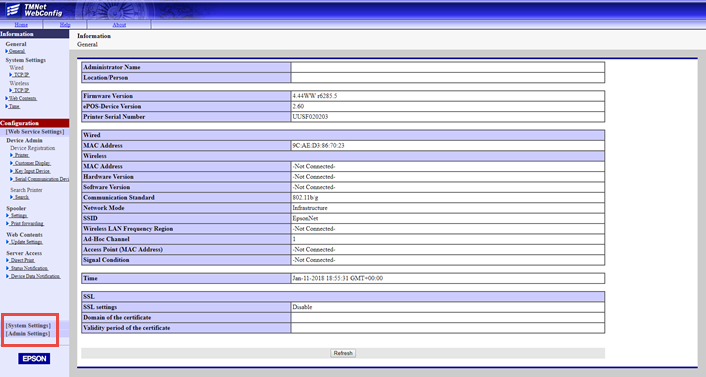
- Below Security, select SSL.
- Select Enable and Create the self signed certificate, then select Apply.
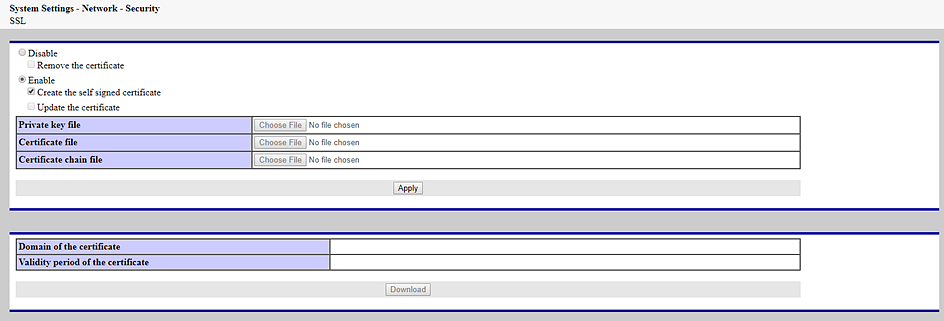
- Restart your printer as instructed on-screen. When the device restarts, these steps are complete.
- This concludes the creation and installation of the SSL on the receipt printer. Next, you'll want to proceed to Step 2b if you'll be using Meevo on a desktop PC, and/or proceed to Step 2c if you'll be using Meevo on an Apple device.
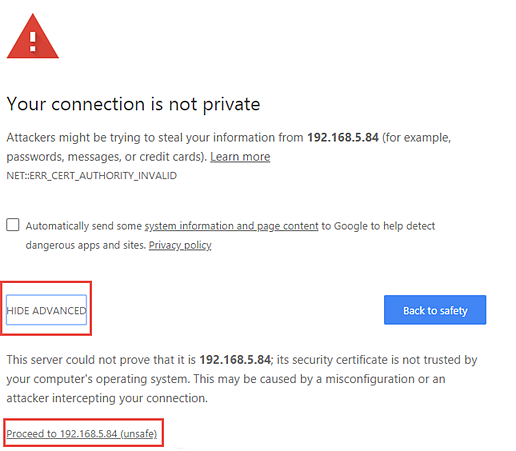
- Type the printer's IP address into your browser to connect to the printer configuration utility. Despite what your browser indicates, connecting to the printer is safe. Select Advanced, and then select Proceed to [IP address].
- Log into the utility using the default credentials provided with the printer. For most Epson printers, these credentials are username: epson and case-sensitive password: your printer's serial number
- Again, connecting to this printer is safe; the browser reads Not secure because we have not yet instructed your Operating System to trust the new certificate.
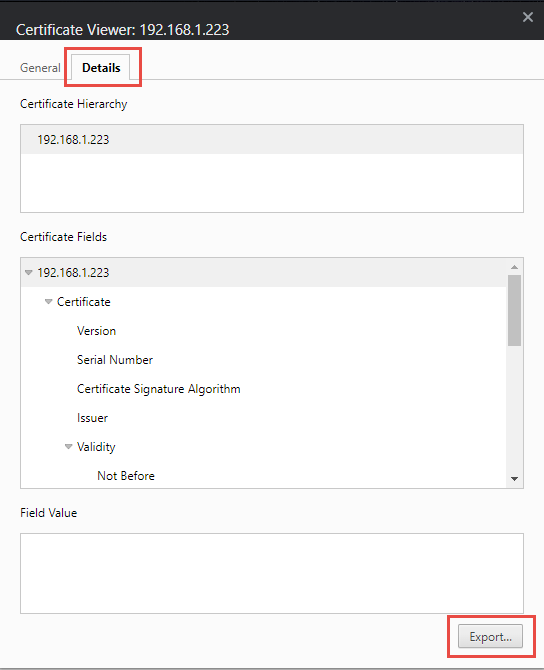
- Click on the Not secure area of the browser address, and click Certificate (Invalid).

- In the pop-up Certificate window, select the Details tab, and then click Copy to File.
- On the Certificate Export Wizard Welcome screen, click Next.
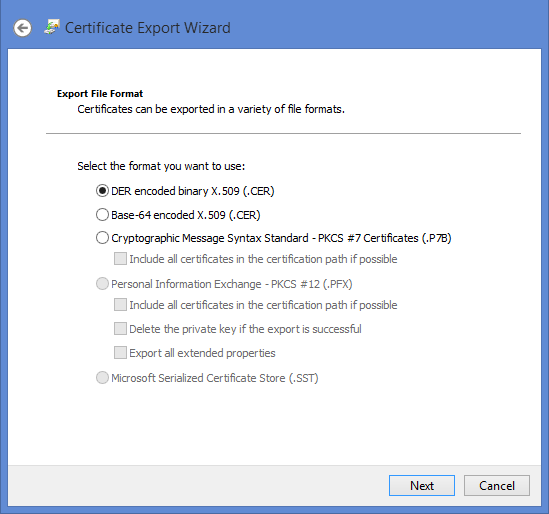
- Select the DER encoded binary X.509 (.CER) export file format, and click Next.
- To save the file locally, click Browse, name the certificate Epson CSR, and save the file to your desktop. Then, click Next.

- On the final screen, review the details, and then click Finish. A small window will appear with a The export was successful message.
- Next, on the keyboard, select the Windows key + R and type mmc into the Run window, and click OK. This opens the Management Console.

- On the Management Console, click File > Add/Remove Snap-in.
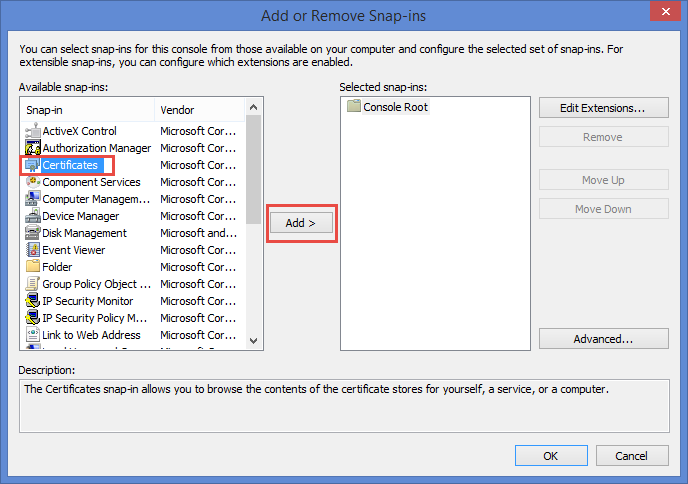
- In the Add or Remove Snap-ins window, click Certificates and then click Add.
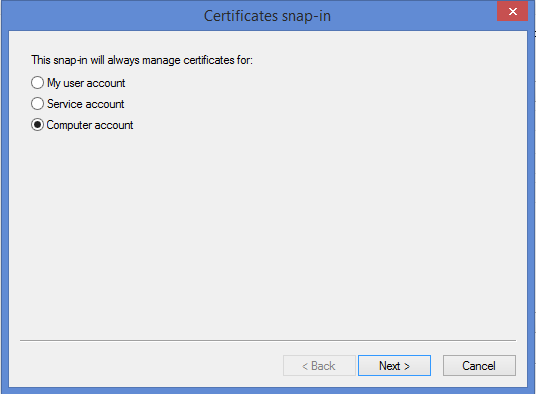
- On the Certificates snap-in window, click Computer account and then click Next.
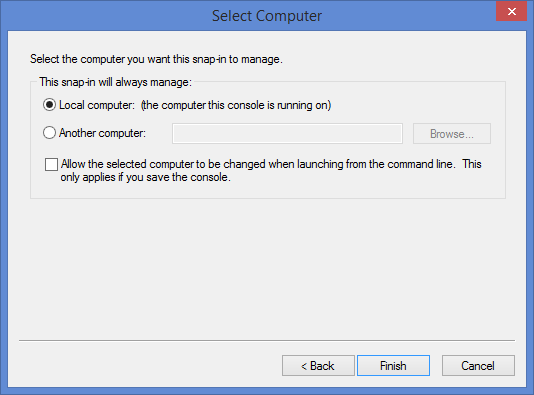
- Select Local computer: (the computer this console is running on) and click Finish.
- Click OK to close the Add or Remove Snap-ins window.
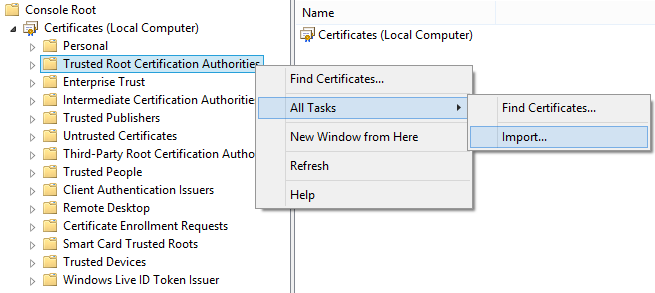
- Back in the Management Console, click Certificates to expand the list, right-click Trusted Root Certification Authorities, and select All Tasks > Import.
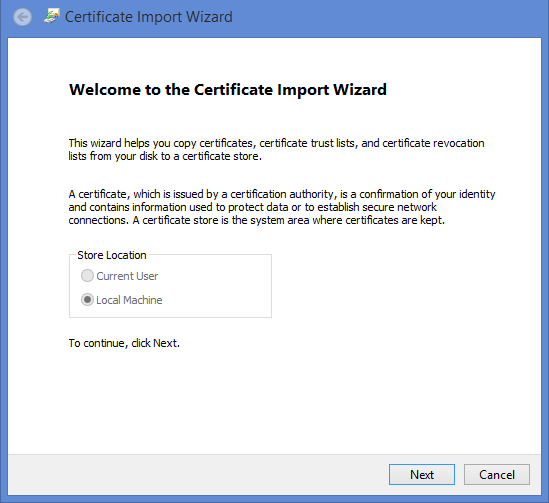
- On the Import Wizard window, click Next.
- On the File to Import window, click Browse and open the Epson CSR file that you created earlier. Click Next.
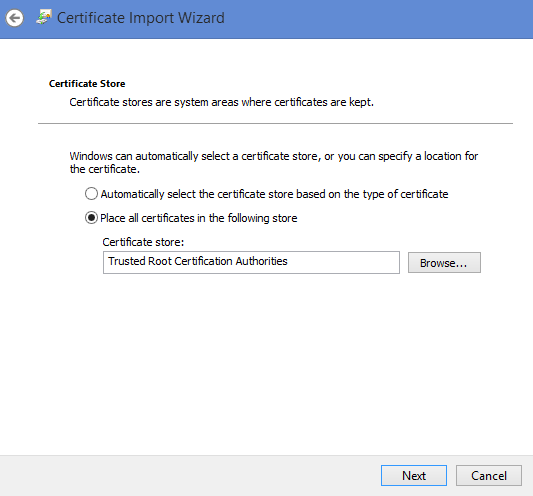
- Ensure that Place all certificates in the following store is selected, and click Next.
- On the final screen, review the details, and then click Finish. A small window will appear with a The import was successful message.
- To verify that the certificate was added, in the Management Console, expand Certificates > Trusted Root Certification Authority and select Certificates. The printer's IP address should be the first one listed, assuming the list is being sorted by the Issued To column.
- When finished, close the Management Console. You do not have to save console settings (select No).
- If you will be using Meevo with an Apple device, proceed to Step 2c. If not, move on to Step 3 to add the printer to Meevo.
Note: Your Apple device must be on iOS version 11 or later to be able to install a certificate profile.
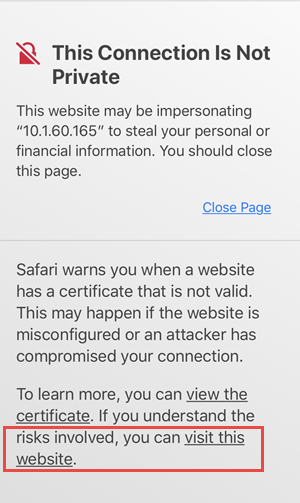
- On your Apple device, type the printer's IP address into your browser to connect to the printer configuration utility. Despite what your browser indicates, connecting to the printer is safe. Select Show Details, and then select Visit this website.
- Log into the utility using the default credentials provided with the printer. For most Epson printers, these credentials are username: epson and case-sensitive password: your printer's serial number
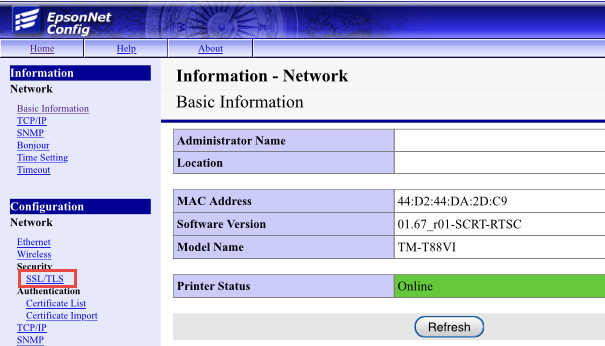
- Select SSL/TLS.
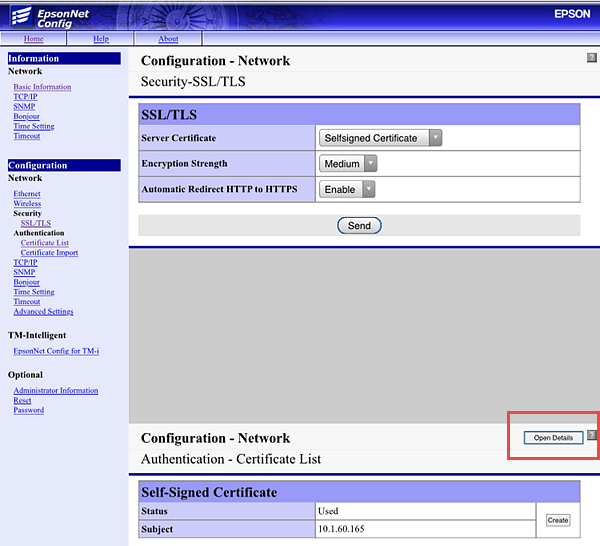
- Select Open Details.
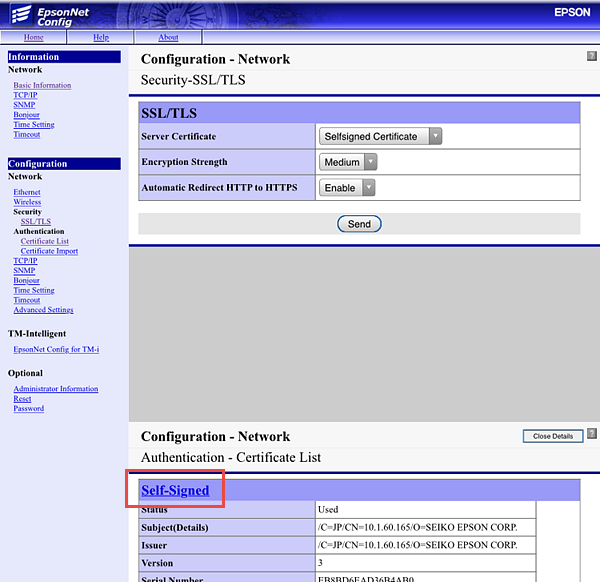
- Select the Self-Signed hyperlink.
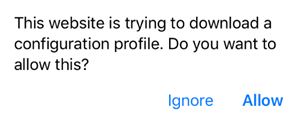
- Select Allow on the confirmation message, and the Close on the final message.
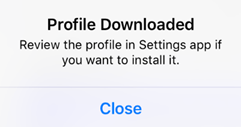
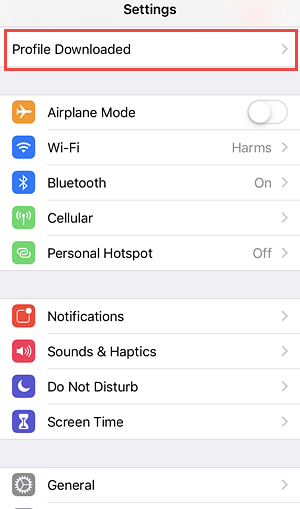
- Next, go to Settings and select Profile Downloaded towards the top of the list.
- On the Install Profile screen, select Install in the top-right of the screen.
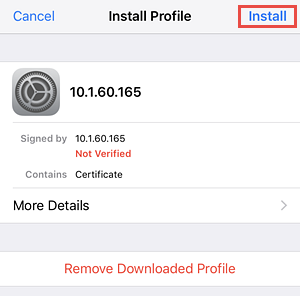
- Select Install again on the Warning message, and Install once more from the slide-up menu.
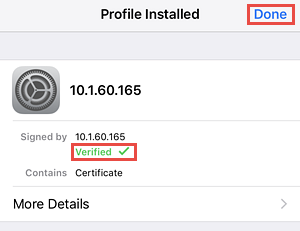
- If Verified appears on the Profile Installed screen, this indicates successful installation of the Epson SSL certificate on your Apple device. Select Done, and continue with the steps below to enable the newly installed certificate.
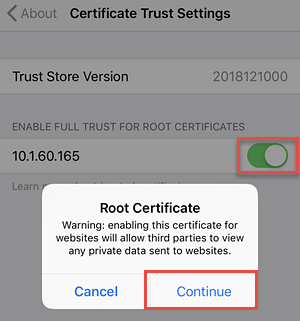
- Next, go to Settings > General > About on your Apple device. Scroll down to Certificate Trust Settings and select it.

- Finally, enable the IP address of the printer and select Continue on the Root Certificate message.
- Proceed to Step 3 to add the receipt printer to Meevo.
Step 2d: Install the SSL Certificate on your MacStep 2d: Install the SSL Certificate on your Mac
- Type the printer's IP address into your browser to connect to the printer configuration utility. Despite what your browser indicates, connecting to the printer is safe. Select Advanced, and then select Proceed to [IP Address].
- Log into the utility using the default credentials provided with the printer. For most Epson printers, these credentials are username: epson and case-sensitive password: your printer's serial number
- Select the Not secure area of the browser address and select Certificate (Invalid).
- The certificate pops up; drag the image of the certificate onto your desktop.
- Close your browser (Chrome).
- Double click the certificate image on the desktop. You are prompted for the Mac's username and password so that the certificate can be attached to the keychain. Enter your Mac credentials.
- Click on the certificate in the keychain to open up the details for the certificate. Click Trust, and change the top option to be Always Trust. Closing this window will prompt you once more for the Mac username and password. Enter these Mac credentials.
- Reopen Chrome and Meevo. Log in and trust the printer once again, entering the username and password for the printer.
- Test print and confirm it stays secured.
- Proceed to Step 3 to add the receipt printer to Meevo.
Connection Window Mode
In Connection Window Mode, you do not install an SSL certificate on any receipt printers. Instead, a connection between Meevo and the printer is established by a pop-up window that you must not close if you want to print, but you can keep it minimized and out of sight.
Note: Due to the way pop-up windows appear on mobile browsers, this method is not recommended if you are running Meevo primarily on mobile devices.
Benefits:
- Your Meevo browser will always appear secured, but connection to the printer is achieved via a pop-up window that communicates over HTTP instead of HTTPS.
- Does not require you to create a self-signed certificate, so this setup method is quicker than Trust Mode.
Drawbacks:
- A connection between Meevo and the printer is established by a pop-up "printer connection" window that you must not close, but can keep minimized and out of sight.
- The first time you connect to the printer during a session, you will need to connect using the "printer connection" window. This only needs to be done once per session, but it is required for each session.
There are no additional steps for Connection Window Mode, so you can jump right to Step 3: Add the printer in Meevo below.
Step 3: Add the printer in Meevo
- In Meevo, go to Register > POS Hardware or type poshardware into the Convobar.
- Select the Receipt Printer tab and select Edit.
- Select Add Additional Receipt Printer and fill out all fields exactly as explained below.
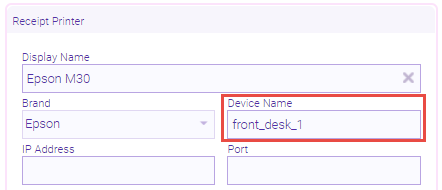
- Display Name: Enter a unique name for the device. Make sure you use a name that makes this printer easily identifiable in Meevo lists.
- Brand: Select Epson.
- Device Name: Use the Device Name you entered in step 16 of the previous section (the Device ID you entered under Printer List in the Epson Printer Utility).
Important! The Device Name in Meevo must match the Device ID in the Epson Printer Utility, or the printer will not function properly in Meevo.
- IP Address. Enter the IP address exactly as it appears on the receipt printout from Step 1: Hook up the printer.
Important: The IP address for each receipt printer must be static and unique to that printer. Contact your network administrator to ensure that your printer IP address will not change.
- Follow the final steps below according to your setup method:
Trust Mode
- Port: Enter 8043. This is Epson's default port number for communicating over HTTPS.
- Select Use Trust Mode.
- Select Trust
 . A "connection is not secure/private" message appears (the actual message depends on your browser). This is because your browser does not yet "trust" the receipt printer.
 - To trust the printer, follow the instructions according to your browser:
- Select Advanced.
- Select Proceed to [IP address]. Despite what your browser indicates, connecting to the printer is safe.
- The printer's configuration utility screen appears, or a login window to the utility screen appears. Either indicates a successful "trust" between the device and the printer.
- Select Advanced.
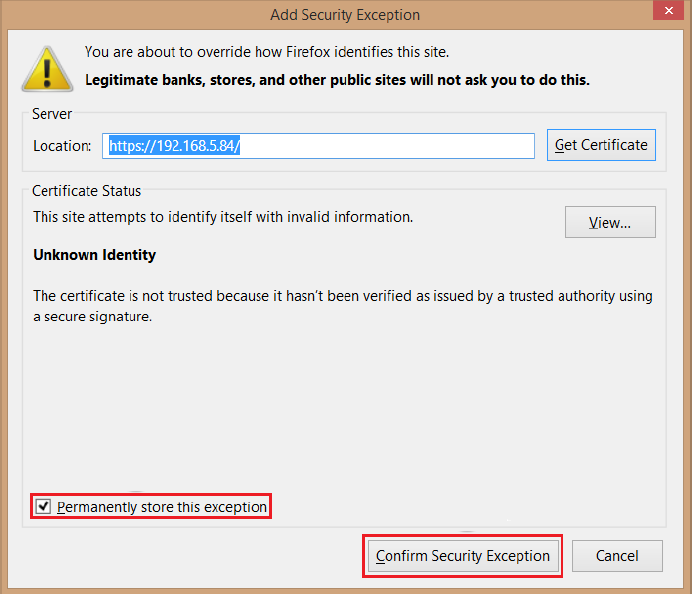
- Select Add Exception.
- Select Permanently store this exception.
- Select Confirm Security Exception. Despite what your browser indicates, connecting to the printer is safe.
- The printer's configuration utility screen appears, or a login window to the utility screen appears. Either indicates a successful "trust" between the device and the printer.
- Select Show Details.
- Select Visit this Website.
- The printer's configuration utility screen appears, or a login window to the utility screen appears. Either indicates a successful "trust" between the device and the printer.
- Select Test Receipt to send a test receipt to the receipt printer.
Connection Window Mode
- Port: Enter 8008.
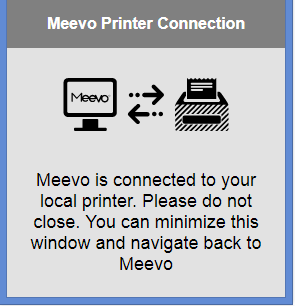
- Select Test Receipt to print a test receipt.The Printer Connection window appears (shown below). Minimize this window and leave it open to maintain connection to your printer. If you close this window and attempt to print through Meevo, the window will appear again.
- Select Save to store your changes.