AQ010: Appointment Listing with Visit Notes
The AQ010 report displays appointment details, including Visit Notes and Block Reasons, for appointments that are scheduled within the date range.
Tip: Run the AQ010 report each morning to create personalized appointment listings for each employee, including client visit notes (if any) for each client. Client Visit Notes inform your employees of any special needs or concerns for each client who is scheduled for appointments that day.
Report definitions
Below are the fields that appear in the AQ010:
- Date/Time: Date and time of the appointment or block.
- Client Name: Name and ID of the client attending the appointment or the block name, and if the client has multiple services in a day, the employee/resource the client is coming from and employee/resource the client is going to. If the client has a membership, their membership number displays in parentheses next to their name.
- Service, Resource, & Equipment: Type of service scheduled (including add-ons), the resource it was scheduled in, and equipment used.
- Last Visit: The date of the client's last service visit.
- Below each appointment entry are any applicable appointment notes, block reasons, and visit note details. This information appears across the entire row.
Setting up the AQ010 report
- Type AQ010 in the Convobar, or go to Meevo > Reports > Appointments, and then select the AQ010 report.
- Select a date or date range for running the report:
- To run a report for a specific date range, select Custom and specify the Start Date and End Date for the report.
- Otherwise, select a predefined date or range (Yesterday, This Week, Last Week, etc.).
Note: If you select a predefined range (a date other than Custom), you can still change the Start Date and End Date. Doing so automatically changes the date range to Custom.
- Show client phone numbers: Includes client phone numbers (pulled from the client profile) in the report.
- Show Visit Notes: Displays visit notes for the client, if any.
- Display last __ visit notes per service: Determines how many of the most recent visit notes will appear on the report; you can display anywhere from 5 to 10 visit notes per service.
- Display Visit Notes from All Locations: Displays all Visit Notes for this client, regardless of location. If this option is not selected, the report will only display Visit Notes that were entered at the current location. Note that this option is revealed only if the Show Visit Notes across locations option is enabled in Central Office Business Information.
- Sort report by: Organize data in the report by servicing Employee or Resource.
-
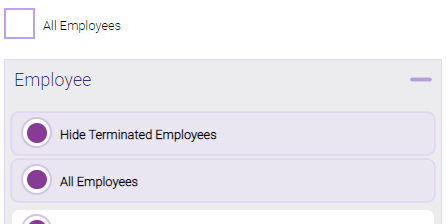
All Employees: Enable this checkbox to run the report for all employees within the date range. This includes active, inactive (including terminated), and deleted employees. Or, to run the report for specific employees, deselect the checkbox and use the drop-down to select employees or Employee Categories. You can show or hide inactive employees in this list, but deleted employees will never appear here. Note the All Employees "bubble" in the Employee list selects all employees in that list; it is not the equivalent of selecting the All Employees checkbox.

Note: Selecting All Employees will also return any data tied to the House employee.
- All Resources: Enable this checkbox to run the report for all resources, including data from inactive and deleted resources. Or, to run the report for specific resources, deselect the checkbox and use the drop-down to select the desired items. You can show or hide inactive resources in this list, but deleted resources will never appear here. Note the All Resources "bubble" in the Resources list selects all resources in that list; it is not the equivalent of selecting the All Resources checkbox.
-
Running the report
- When you are ready to generate the report, select a Report Format beside the Run Report button.

- Here is a rundown of each format type:
- PDF: Each time you select Run Report with PDF selected, Meevo opens a separate browser tab that displays the PDF'ed report. Meevo remains on the setup page, so you can quickly jump back over to Meevo to run more date ranges or other reports. Each PDF report you run will open its own browser tab, so you can easily review and compare reports by simply jumping between browser tabs.
- HTML: This is our original legacy format, which opens the report within Meevo. All of the functionality within that report is still there and available via the toolbar.

- XLSX: Each time you select Run Report, your browser auto-downloads the report in .xlsx format. Select the downloaded file in the browser footer to open the spreadsheet.
- Select Run Report to generate the report in your chosen format. Depending on the type of report and criteria you entered, this process may take a few minutes.