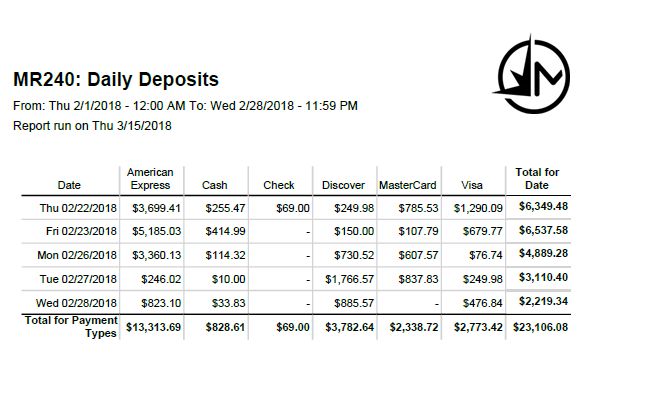
MR240: Daily Deposits
The MR240 report displays total deposits for each day within the selected date range.
Tip: After closing your cash drawers, run the MR240 to view details on the deposit amounts and final totals for each payment type.
Important: To ensure accuracy in this report, make sure you close your drawers at the end of each day. Otherwise, report totals may be inaccurate. Also, be aware that system drawers such as eGift, Online Booking Prepay, etc. will not appear in this report, as actions such as closing or adding deposits cannot be performed on system drawers. You can report on system drawers in reports that have the Drawer mover in the setup screen, such as the MR080.
Report definitions
- Date: The date of the deposit.
- Cash: Sum of all cash deposits, by day.
- Check: Sum of all "Actuals" entered into the Checks field of the drawer closing screen, by day.
- American Express: Sum of all "Actuals" entered into the American Express field of the drawer closing screen, by day.
- Discover: Sum of all "Actuals" entered into the Discover field of the drawer closing screen, by day.
- MasterCard: Sum of all "Actuals" entered into the MasterCard field of the drawer closing screen, by day.
- Visa: Sum of all "Actuals" entered into the Visa field of the drawer closing screen, by day.
- Total for Date: Total amount of each payment type, listed by date.
Setting up the MR240 report
- Type MR240 in the Convobar, or go to Meevo > Reports > Register/Sales, and then select the MR240 report.
- Select a date or date range for running the report:
- To run a report for a specific date range, select Custom and specify the Start Date and End Date for the report.
- Otherwise, select a predefined date or range (Yesterday, This Week, Last Week, etc.).
Note: If you select a predefined range (a date other than Custom), you can still change the Start Date and End Date. Doing so automatically changes the date range to Custom.
Running the report
- When you are ready to generate the report, select a Report Format beside the Run Report button.

- Here is a rundown of each format type:
- PDF: Each time you select Run Report with PDF selected, Meevo opens a separate browser tab that displays the PDF'ed report. Meevo remains on the setup page, so you can quickly jump back over to Meevo to run more date ranges or other reports. Each PDF report you run will open its own browser tab, so you can easily review and compare reports by simply jumping between browser tabs.
Note for viewing on iOS: If viewing a PDF on a mobile device running iOS, swipe from left to right on the screen to return to Meevo. - HTML: This is our original legacy format, which opens the report within Meevo. All of the functionality within that report is still there and available via the toolbar.

- XLSX: Each time you select Run Report, your browser auto-downloads the report in .xlsx format. Select the downloaded file in the browser footer to open the spreadsheet.
- PDF: Each time you select Run Report with PDF selected, Meevo opens a separate browser tab that displays the PDF'ed report. Meevo remains on the setup page, so you can quickly jump back over to Meevo to run more date ranges or other reports. Each PDF report you run will open its own browser tab, so you can easily review and compare reports by simply jumping between browser tabs.
- Select Run Report to generate the report in your chosen format. Depending on the type of report and criteria you entered, this process may take a few minutes.