Setting Up and Using Intelli-Booking
Depending on the client, a servicing employee may require additional or less time to complete a service. Intelli-Booking allows you to store timings that are unique to a client, so when the client is booked with the configured employee and service, those client-specific timings will be used automatically. This eliminates the step of having to manually change the timings in the Appointment Book each time the client is booked.
When Intelli-Booking is configured, all methods for booking an appointment honor Intelli-Booking timings, including Online Booking, the Online Wait List, Walk-in Manager, Scan for Opening, and the Convobar. Your Intelli-Booking settings override any employee-specific timings you may have set up.
Setting Up Intelli-Booking
Intelli-Booking options exist in several areas of Meevo, including employee profiles, service definitions, and Business Preferences. You'll need to enable options in all of those places to get up and running with Intelli-Booking.
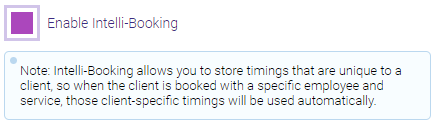
- First, enable Intelli-Booking within a desired employee profile by selecting Enable Intelli-Booking from the profile's Main tab.
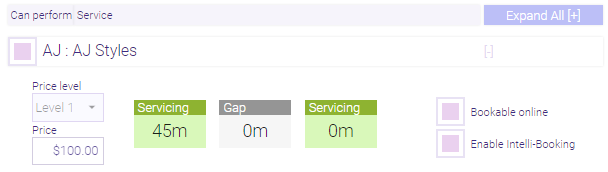
- Next, go to the Services tab of the employee's profile. Of the services they are able to perform, select which should be eligible for Intelli-Booking by selecting Enable Intelli-Booking.
- Note: Meevo provides an option on each service definition that will perform this step automatically, service by service. If you plan on allowing Intelli-Booking for all services that employees can perform, you can skip Step 2 and jump right to Step 3.
- Repeat Step 1 (and Step 2 if applicable) for all desired employees.
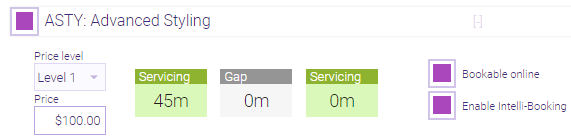
- In each desired service definition, select Enable Intelli-Booking from the Main tab. This makes the service itself eligible for Intelli-Booking timings.
- If you skipped Step 2 above, you still need to enable Intelli-Booking on the services that employees can perform. Select the sub-option Enable employee(s) that are configured to perform this service and enabled for Intelli-Booking....

- Upon save, the Enable Intelli-Booking option will be enabled for this service on the Services tab of all Intelli-Booking employees.
- Repeat these steps for each desired service definition.
- If you skipped Step 2 above, you still need to enable Intelli-Booking on the services that employees can perform. Select the sub-option Enable employee(s) that are configured to perform this service and enabled for Intelli-Booking....
- Finally, in the Appointments section of Business Preferences, select Enable Intelli-Booking.to turn on the feature and begin defining client-specific service timings in Meevo.
Setting Up Intelli-Booking when adding a new service
If you are adding a new service, you can streamline setup by following the steps below.
- Select Enable Intelli-Booking on the Main tab of the new service definition.
- Select the Employees tab and select each employee who should be able to perform this service.
- Within each employee's row, select Enable Intelli-Booking.
To add or update client-specific timings from the Appointment Book
Most commonly, client-specific timings will be set from the Appointment Book as you are booking an appointment. The concept is that you will only need to set the client-specific timing once, and then it will be used going forward each time the client is booked with the configured employee and service. However, if you need to change these settings, the steps below also apply to updating existing Intelli-Booking timings. Alternatively, you can update timings from the client profile's Booking Preferences tab.
- Create the appointment in the Appointment Editor. Make sure the select Service and Employee are enabled for Intelli-Booking.
- In the example below, Arthur is booked for a haircut, and the default Haircut service step set to 30 minutes. But in the past, the service provider Hosea only needed 20 minutes to perform a haircut on Arthur, so we can use Intelli-Booking to define this timing for this and future appointments.

- In the Appointment Editor, select the Service Steps icon and change the Servicing step timing. In our case, we changed it to 20. Select OK to close the Service Steps window.
- A message is displayed, asking if you want to Use these client specific timings for all future appointments (with this employee)? Select Yes to store the timings in the client profile Booking Preferences tab.

- The appointment now reflects the new 20 minute timing. Select Save on the Appointment Editor to finish.

- To verify this new Intelli-Booking timing, you can go to the client profile's Booking Preferences tab and see that this service was added. Select the [+] icon above the service to reveal the Intelli-Booking timings.

To set or update client-specific timings from the client's profile
Less frequently, you may find that you need to set, update, or view Intelli-Booking timings for a client who is not booked for an appointment. These actions can all be done from the client profile's Booking Preferences tab at any time. Alternatively, you can update the Intelli-Booking timings the next time you are booking the client by following the steps in To set client-specific timings from the Appointment Book.
- Locate and select the client's profile, and select the Booking Preferences tab. You can view, edit, and update existing Intelli-Booking timings here:
- To add a new Intelli-Booking timing, choose an Intelli-Booking-enabled service from the Select a service to configure drop-down.
Note: These steps apply to editing Intelli-Booking timings as well.
- Select the [+] icon above the service to reveal the Employees drop-down.
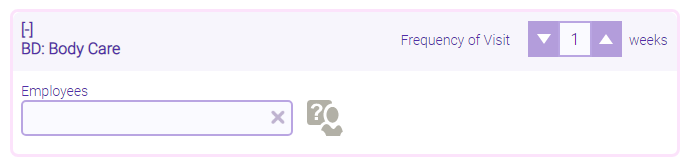
- Select an Intelli-Booking employee from the drop-down. Only employees who can perform that service and who have Intelli-Booking enabled are listed. Note that you can select the Any Employee icon to set these timings for any employee who is Intelli-Booking enabled for this service; you'd use this option for clients who require a certain amount of time for a service, regardless of who is performing it.
- Set the timings as needed. Repeat these steps for each service you want to configure.