Adding or Editing an IP Restriction
What is the IP Restrictions feature?
The IP Restrictions feature determines who can access Meevo from outside the business. Use IP Restrictions to grant offsite Meevo access to your users and employees, and to determine their security (level of access) when they log in offsite.
Note: For IP Restrictions to work properly, your business location must have a static IP address.
How does the IP Restrictions feature work?
There are three different ways to provide employees with offsite access to Meevo:
- Whitelisting IPs: Grant offsite access to any "whitelisted" IP addresses (IPs you added to the Location IP list). When an IP address is "whitelisted," it means that any Meevo user can log in from that address, but it also means that access is restricted from all IP addresses that are not in that list.
- Add your business's static IP address and any other IP addresses that will be "whitelisted."
- When logged in, users will have their usual security role. That is, the same security role and permissions that they have when they are on-premises.
- Offsite security access: To grant access to users who are logging in from a non-whitelisted IP address, you can map their Internal Security Roles to Offsite Security Roles. This is like saying "users who normally have this security role when they are within my business will have this Offsite Security Role if they are logging in from an IP address not defined in the Location IP List."
- User override access: Lastly, you can add users to the User Override list, which grants those roles their usual security access to Meevo from anywhere, regardless of their IP address.
To add an IP Restriction
IP Restrictions are not enabled until you add (whitelist) at least one IP address, as described in the steps below. When an IP address is added to the list, you've restricted access to Meevo from all IP addresses that are not in that list.
- To get here, type iprestrict into the Convobar, or go to Meevo > Business Settings > IP Restrictions.
- On the Main tab, select Edit.
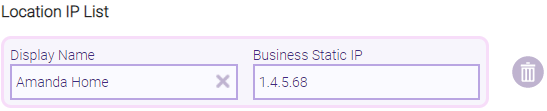
- Display Name: Enter a name that will make this item easy to identify in lists or menus in Meevo.
- Business Static IP: Here, you create a list of all "whitelisted" IPs. "Whitelisted" means that any Meevo user can log in if they are connecting from an IP address that appears in this list. When logged in, users will have the same security role that they have when they are on-premises.
- Your Business Static IP must be entered first to allow users access to Meevo when they are within your business. Once you've added your Business Static IP, you can add additional static IP addresses that you want to whitelist. Select Show IP to populate the field with the address from which you are currently accessing Meevo.
- Select Add Business IP to add that IP to the list. You can repeat these steps to add as many IPs as desired.
- In the Offsite Security Access section, define the level of access for users logging into Meevo from non-whitelisted IPs. Users who normally have this Security Role when onsite (Internal) will have this Security Role (Offsite) when logging in from an IP address that is not in the Location IP List.
- Internal Security Role: This is the usual role that a user is granted when logging into Meevo from a whitelisted IP (that is, the role that appears in an employee profile's Security tab).
- Offsite Security Role: This defines the level of access a user will have if logging into Meevo from an IP address that does not appear in the list.
- Select
 Add Offsite Security Role Access.
 - User Override (Same External Rights as Internal): Users that are added here will be granted their usual security access if logging into Meevo from an IP that is not in the list.
To edit an IP restriction
Edits to IP Restrictions take place immediately, so be aware of this if adding or editing existing lists.
- Type iprestrict into the Convobar, or go to Meevo > Business Settings > IP Restrictions.
- On the Main tab, select Edit.
- Make your changes and select Save when finished.