Booking a Resource
How do I book an appointment in a resource?
To book a resource, the service being booked must be associated with the resource, and the resource must be available according to your configured Business Hours.
- Book a service in the resource as explained in this topic using Appointment Book's Resource View.
- Alternatively, you can book the service in Employee View. If the service or a service step has been assigned to a resource, then the Resource field will appear in Appointment Editor. There, you'll select a configured resource..
Note: Be sure to review details on this Business Information setting that affects how Meevo auto-assigns employees in resources.
How do I associate a resource with a service?
This can be done through the Resources or Resource Categories maintenance forms, the Services > Resources form, or through the step timings in Services > Main. By creating those associations, you ensure that the service cannot be booked unless at least one assigned resource is available.
How do I double-book a resource?
Meevo will never automatically double-book a resource, but you can manually double-book a resource by:
- Changing the Resource drop-down in the Appointment Editor to the resource you want to double-book, or
- Moving the appointment to the resource while in Resource View.
To book a service in a resource
Note: If a client is booked for multiple services that use multiple resources, Meevo prioritizes keeping the client in the same resource for as many of the services as possible.
- Open the Appointment Book and select the Resource View.
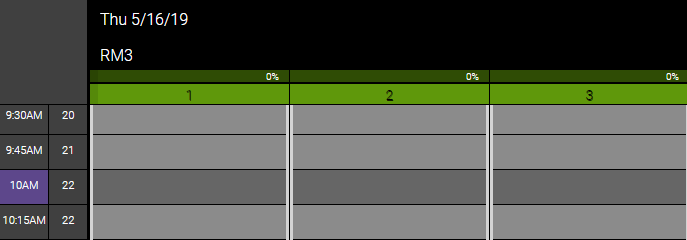
- Locate the resource on the book. The number of columns below the resource name correlates to the Maximum client capacity option in the Resources definition. In the example below, there are 3 numbered columns because Room 3 has a divider and a maximum client capacity of 3. If the Maximum client capacity is set to 0, Meevo will allow double-booking of the resource.
- Select your desired time block and select Book to open the Appointment Editor.

- Enter the appointment information into the Appointment Editor. You can refer to Booking an Appointment for details on completing the Appointment Editor.
- If the selected service is configured to be performed in that resource (according to the resource definition) and the resource has a Maximum Available Capacity of 1 or more, then the Resource field is filled in automatically.
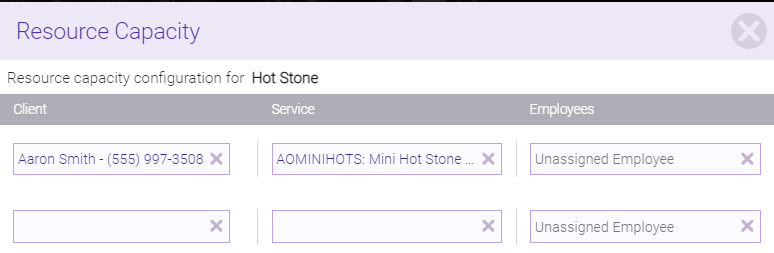
- To make changes to clients or services in the resource, you can select the Resource config button to the right of Resource.

- You can add clients and services to the resource using this window.
- Services in this form are limited to those that can be performed in the resource.
- When finished, select Save to close the Resource Sharing Assistant (if open) and Save to close Appointment Editor.