Setting Up MeevoTips
Before you can begin collecting tips through MeevoTips, both the business owner and any participating staff members must complete a few setup tasks.
Select a link below to jump to a specific section:
- (Owner) Connect Meevo to your MeevoTips account: Link your business bank account for tip disbursement debits and generate a token that you'll copy into Meevo, connecting the two platforms.
- (Staff) Download the Tippy Mobile App: Staff members will download the Tippy App, set up a profile, and connect to Branch for tip deposits. Once setup is complete, each staff member must be approved in the Tippy Dashboard by the owner.
- (Owner) Approve and map staff members: In the Tippy Dashboard, approve pending staff members. Then, in Meevo, map employee profiles between Meevo and MeevoTips.
- (Owner) Set up the Tippy Kiosk: Power on the Tippy Kiosk, complete initial kiosk setup, and associate the kiosk to a Drawer in Meevo.
- (Owner) Enable the MeevoTips register workflow: Once everything is configured, start using the MeevoTips in the Meevo Register by toggling the Enable Tippy Integration switch on in Meevo.
Note: It may take up to 24 hours for the integration to connect, even after being fully configured.
Before you begin: Security settings
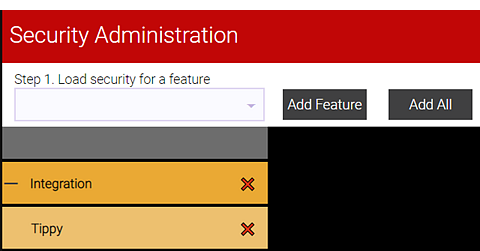
In Security Administration, the Integration > Tippy security key controls access to the Tippy (MeevoTips) setup screen in Meevo. This key is set to Deny by default. Employees who need access to the Tippy (MeevoTips) setup screen in Meevo need a Security Role with Grant access to the Tippy key.
Note: Once MeevoTips is configured and ready for use, any user with access to the Meevo Register can process transactions with MeevoTips, regardless of the Tippy security key setting.
Step 1: Connect Meevo and your MeevoTips account
For this step, you'll need your business bank account information and your business EIN / Entity Name.
- Log into the Tippy Dashboard and select Manage > Integrations.
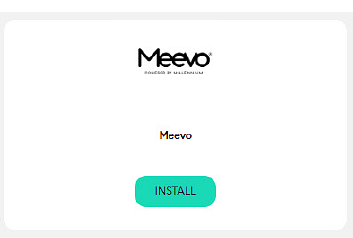
- Select Install below the Meevo Integration tile, then click Install Integration.
- Click the Link Bank Account button, select your bank, and enter your bank's online login information.
- On the Success! window, click Continue.
- Go back to Manage > Integrations > Manage Meevo.
- Select the Copy token to clipboard icon beside your token to copy it.
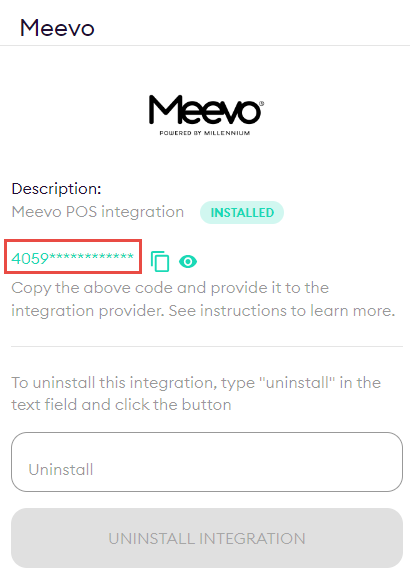
- Log into Meevo and open the MeevoTips Integration on the Main tab.
- Click Edit and then paste your token into the Tippy Account Token field.
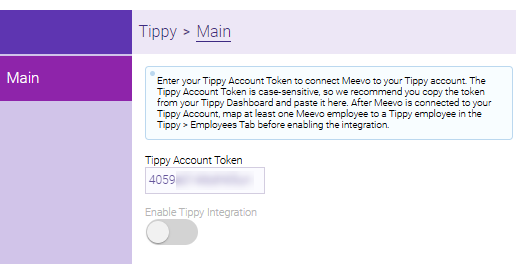
- Select Save when finished.
- After saving, new tabs appear in Meevo:
- The Employees and Log tabs appear on the Tippy (MeevoTips) setup screen.
- The Tippy Kiosk Config tab appears within Drawer definitions.
Step 2: Employee/Staff Setup
Next, add your employees in the Tippy Dashboard and then map them to their equivalent employee profiles in Meevo.
Before you begin:
- We recommend mapping all of your employees who can receive tips, as employees who are not mapped will not have their tips sent to MeevoTips.
- In Meevo, ensure that Allow Sales and Allow Tips are enabled within the employee profiles.
2a. Add staff to the Tippy Dashboard
For this step, each staff member who receives tips should download the Tippy Mobile App and set up an account. This adds them as "Pending" to the Tippy Dashboard, where an owner or manager will approve them and then map them in Meevo.
- Staff members will ask you for a Company Code when filling out their profile. This is the Account Code found within your Tippy Dashboard when logged in.
- During setup of the Tippy Mobile App, all staff using MeevoTips will be required to connect to Branch, a digital banking app. This will allow them to create a digital wallet for instant access to their tips, for free.
2b. Approve staff in the Tippy Dashboard
- Once staff is enrolled with the Tippy Mobile App, an owner or manager will need to approve them within the Tippy Dashboard.
- To approve staff, log into the Tippy Dashboard and follow the instructions outlined in Tippy's Help article Approving Staff.
2c. Map employees between Meevo and MeevoTips
Once staff are approved in the Tippy Dashboard, they are ready to be mapped in Meevo.
- In Meevo, open the Tippy (MeevoTips) setup page and select the Employees tab. This tab is visible only when a MeevoTips Account Token is saved in Meevo.
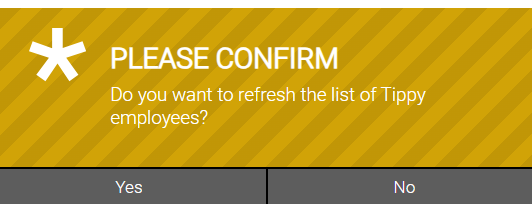
- Select Edit. A message asks if you'd like to refresh the list of employees; select Yes.
- The list of employees on the left are your staff currently in MeevoTips. Map those employees to their Meevo profiles by selecting a profile from each drop-down in the column on the right.
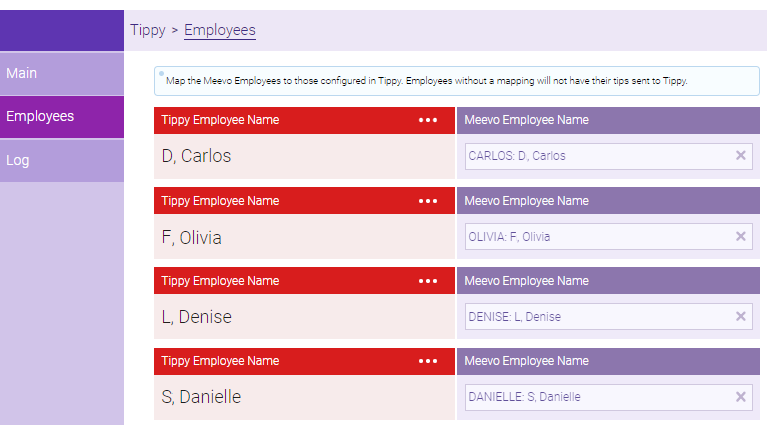
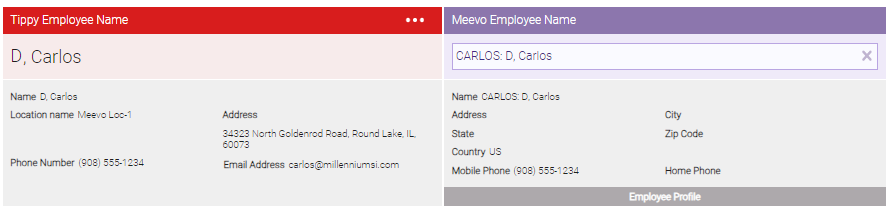
- To view additional information about a profile, select the ellipsis beside Tippy Employee Name.
- You can jump directly to a mapped Meevo profile by selecting Employee Profile on the bottom of the card.
- Employees who are not allowed to receive tips (per their Allow tips Meevo profile setting) have an icon beside their name. Those employees will not appear to clients in the Tippy Kiosk.

- When finished mapping, select Save.
Step 3: Set up the Tippy Kiosk
The Tippy Kiosk must be configured and associated with a Meevo Drawer in order to collect tips during checkout.
3a. Set up the Tippy Kiosk
- Power on the device and connect to Wi-Fi.
- Open the Tippy ProX app on the Tippy Kiosk.
- Sign in with your Company Code. This is the Account Code found within your Tippy Dashboard when logged in.
- Follow the prompts through the sign-in process.
- You'll be prompted to choose a location and send a login code.
- The login code can be sent via text or email to any employee listed who is nearby.
- When login is complete, a Welcome screen appears with your Tippy Kiosk Device ID. You'll enter this Device ID into Meevo settings as explained below.
3b. Add the Tippy Kiosk to a Meevo drawer
When a MeevoTips-configured drawer is used in Meevo, selecting Pay Now in the register activates the Tippy Kiosk. One Tippy Kiosk can be tied to one Meevo drawer at a time.
- In Meevo, open Drawers and select a drawer.
- Select the Tippy Kiosk Config tab and select Edit.
- Enter the Tippy Device ID and select Save.
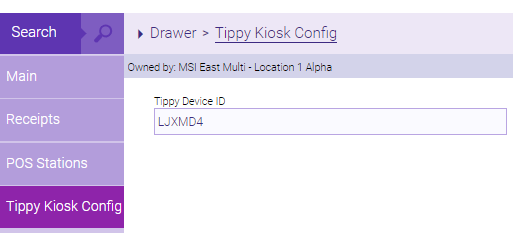
Note: The Device ID appears on the screen of the Tippy Kiosk when it's not associated with a Meevo drawer.
Step 4: Enable the integration
To enable the MeevoTips workflow in the Meevo Register, toggle the Enable Tippy Integration option to ON. Only toggle this on once all setup is complete.
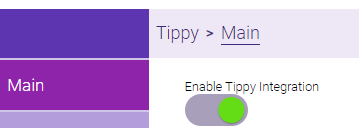
Note: To enable the integration, a valid Tippy Account Token must be saved and at least one employee must be mapped.
Editing employee mappings and adding more employees
- In Meevo, open the MeevoTips integration and select the Employees tab.
- Select Edit. A message appears asking if you'd like to refresh the list of employees. Select Yes.
- Meevo updates the list by pulling the latest information from the Tippy Dashboard. Any newly added employees to the Tippy Dashboard will now appear in this list.
- If a previously mapped Meevo employee is no longer an employee in Meevo, then in place of the name will be Tippy employee no longer exists.
- You can re-map that employee to another profile if needed or simply leave it blank to leave the employee unmapped.
- Map the remaining employees as needed and select Save when finished.