Using Tippy in the Meevo Register
Tippy workflow in the register
- Create transactions in the Meevo register as you normally would. With the Tippy Integration, only the tip workflow is different.
- Employees who appear in Meevo's Add Tip modal will get sent to the Tippy Kiosk and will be available to the client for tipping. This is how you can add or remove employees from being sent to the kiosk.
- Only employees who are mapped in Tippy and have Allow Tips enabled on their Meevo profile will get sent to the kiosk. For example, if both Tanya and Danielle are allowed to receive tips but only Danielle is mapped to Tippy, then only she will appear to the client on the Tippy Kiosk, even if they both appear on Meevo's Add Tip modal.
- You can prepopulate tip amounts in the Meevo Add Tip modal and those amounts will be sent to the Tippy Kiosk. The client at the kiosk can make adjustments if needed.
- Non-Tippy employees can still receive tips through the Meevo Add Tip modal; they just won't appear in Tippy logs or Tippy reports. You'll handle those tips the way you normally would.
- When the client is ready to apply tips, select Pay Now in the Meevo register. Selecting Pay Now initiates the Tippy Kiosk that is associated with the Meevo drawer.
- Meevo displays an overlay with the message Waiting for client to make selections on Tippy kiosk.
- Tippy Kiosks that are in use are locked. If you need to unlock a kiosk for any reason, see Unlocking a Kiosk below.
- The Tippy Kiosk displays the tip options and the display honors your Meevo settings Default tip calculations based upon and Include product sales in tip calculations.
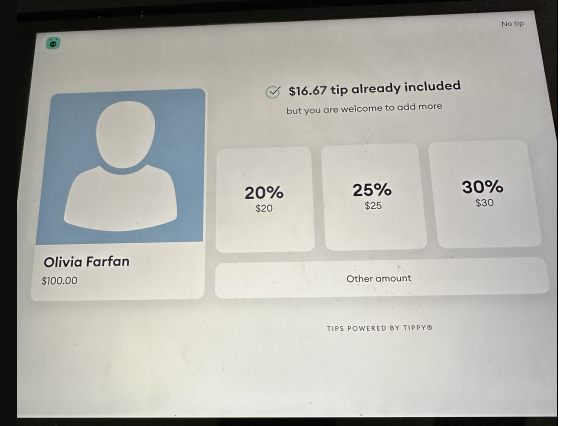
- After the client selects a tip amount, the Tippy Kiosk Purchase Summary screen appears. The client selects Continue to Payment to complete adding the tip.

- In Meevo, the Payment Options / Balance Due screen appears. Clients can pay the balance using any of the supported payment types; it is not required to pay the balance using a credit card.
- The Subtotal on the Smart Receipt includes tips that were entered on the Tippy Kiosk as well as any other manually-entered tips for non-Tippy employees.
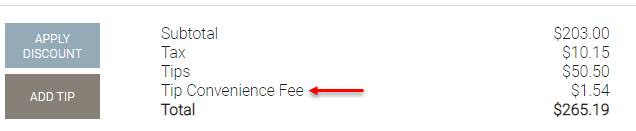
- When Tippy Tips are included on a transaction, a Tip Convenience Fee line appears in the Subtotal. This fee amount comes directly from Tippy and is based on the total tip amount that was applied through the kiosk. Note the Tippy Tip Convenience Fee is waived for service charges (Employee Tips) and prepaid tips on package redemptions.
- You can select Back to Sale if you need to update the ticket and/or re-send employees to the Tippy Kiosk; selecting Pay Now re-initiates the kiosk and tip workflow.
- When ready, finalize the transaction as you normally would. When the Tippy Kiosk is enabled, the Meevo Register will look slightly different:
- The Prompt for Tip checkbox is hidden if the drawer in use is associated with a Tippy Kiosk.
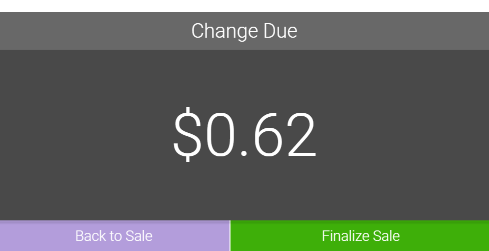
- The Change Due window does not have the usual Add Tips button, as all tips are processed through the Tippy Kiosk. To modify any tips, you can select Back to Sale and trigger the Tippy Kiosk by again selecting Finalize/Pay Now.
- To verify all tips were sent to Tippy successfully, check the Tippy Logs. We recommend checking the Log at the end of each day.
Editing transactions that include a Tippy Tip
Transactions that include a Tippy Tip can be edited like any other, except that the following fields will NOT be editable:
- The employee associated with a Tippy-funded tip
- The Tippy Tip amount that was Tippy funded
- The employee associated with a service if there was a Service Charge (Employee Tip) and the Service Charge was Tippy funded
Refunding a Tippy Tip
Note: If refunding a Tippy Tip, any associated Tip Convenience Fees are also refunded.
Tippy Tip refunds made in Meevo are NOT sent to Tippy, so you'll need to go to your Tippy Dashboard to perform the tip refund there as well. This will complete the refund by removing the funds from the employee and returning the funds to the business.
- Perform the refund in Meevo. After you finalize the transaction, Meevo will display a message directing you to the Tippy Refund data export and Tippy Dashboard.
- Type dataexport into the Convobar.
- On the Data Export screen, generate the Tippy Refund data export. You will use this as a reference when performing those Tippy Tip refunds in the Tippy Dashboard.
- Log into your Tippy Dashboard. Search for the transaction using the OriginalTippyTransactionID listed in the Tippy Refund data export.
- Once you've located the original transaction in the Tippy Dashboard, complete the refund in the dashboard.
Unlocking a Tippy Kiosk
A Tippy Kiosk in use is considered "locked" as it cannot be used by any other application. A locked kiosk will display a lock icon in Drawer Manager and on the Tippy Kiosk Config tab of the Drawer's definition.
If a kiosk is stuck in a locked state (for example due to a power flicker or browser crash), select this lock icon to cancel the interaction that is locking the kiosk. This will reset the Tippy Kiosk to its default idle screen.