Adding an Appointment Request to the Wait List
- From the Wait List, select Add to Wait List.
- Add the Paying Client. As with the Meevo Appointment Book, the Paying Client is pre-populated in the first servicing client field.
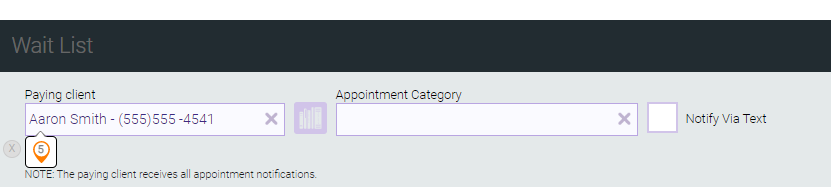
- Select an Appointment Category, if desired. If a client has multiple appointments on the same day, all appointments are grouped under the same selected Appointment Category.
- Select Notify Via Text to notify the Paying Client via text message that an opening has been found. This option takes effect only if notifications are enabled for the business and if the client opted into text message notifications.
- Enter the first Client, Service, and Employee for this appointment request.

- If you select a general employee preference (Any Employee, Any Female Employee, etc.), you can also specify Price level and Employee Category. Otherwise, select Specific Employee and select an employee.
- If a selected service is configured for add-ons, the add-ons modal will appear, where you can select add-ons for this client.
- Select the Service Steps icon to change the service step timings. If you do change the step timings and Intelli-Booking is enabled, you will receive a prompt to confirm if this client-specific timing should be used for all future appointments with this specific employee.
![]()
- Select the Transaction History icon to jump to the client's History tab of their profile.

- Select the "information" icon to view specifics about the service.

- Select Add client/service to add another row to the entry.
- To add another service for the same client, simply select that client again and complete the fields.
- You can add up to a maximum of 5 unique clients per Wait List entry, but each client can have multiple services.
- If you are adding more than one client, Multiple clients options appear at the top of the Wait List.

- Max Wait Between Services: This is the maximum amount of time allowed between services.
- Show same time availability only: Select this option if multiple clients wish to book appointments that start at the same time.
- Show same resource availability only: Select this option if multiple clients wish to have their appointments in the same resource.
- When you are finished setting up clients, services, and employees, you can move on to the date range settings.
- Use the Date Range drop-down or select a specific Start Date and End Date. This is the date range that the appointment request will be active; Meevo will look for openings during this date range.
- The Business Preferences setting A client can be added to the wait list within the next ___ months only determines how many months ahead from today you can set the Start Date.
- Use the Time drop-down to select a time range of the client's availability, or enter a specific Start Time and End Time. This is the time range that Meevo will scan when looking for openings.
- Anytime: Any time between open and close for the location (as defined in Business Preferences).
- Morning: Open time to noon.
- Afternoon: Noon to 4 pm.
- Evening: 4 pm to close.
- Select the days of the week that the client is available. If no days are selected, Meevo will search for openings in every day of the week that the business is open. In the image below, Monday, Wednesday, and Friday are selected.

- Select Add Date/Time Range to add additional ranges to search. You can define up to three different ranges per Wait List entry.
- If desired, enter optional Notes for the request in the tray at the bottom of the slideout. Any note entered here will become an Appointment Note if the appointment ends up being booked. Wait List notes can also be viewed via the Wait List Search screen.
- When finished, select Save to add the appointment to the Wait List.