Installing the Castles AMS1 (MeevoPay Only)

Before you begin
- To use this device, you'll need a Merchant Account with MeevoPay. Review our Meevo System Requirements and Supported Devices to ensure your computer and devices are compatible with Meevo.
- The Castles AMS1 documentation contains important information and details from the manufacturer that are not discussed in this topic. We strongly recommend you review your device documentation before installing the device.
- The AMS1 is a mobile device that must be charged for power via the supplied USB-C cable and plug. We recommend charging the device for at least 4 hours (but preferably until fully charged) before installing. You can complete these setup steps while the device is actively charging.
- This device connects exclusively through Wi-Fi when used with Meevo, and the included SIM card allows for automatic 4G failover should you lose Wi-Fi connectivity. Bluetooth functionality is not supported.
Installation steps at a glance
|
Step 1: Add Your MeevoPay Merchant Account in Meevo (separate topic) |
|
Step 2: Charge the device, add or "pair" it to your Merchant Account in Meevo, and connect it to the internet (this topic) |
|
Step 3: Assign a default Merchant Account and credit card terminal to a drawer in Meevo (separate topic) |
Charge the AMS1
- Make sure you've added your MeevoPay Merchant Account in Meevo.
- The AMS1 is shipped with the following components:
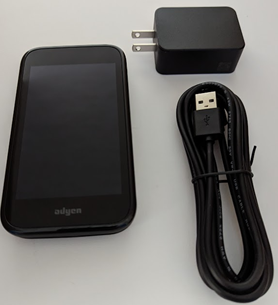
- Castles AMS1
- USB-c cable
- USB power plug
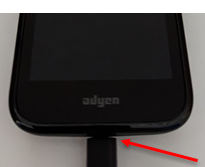
- The AMS1 is a mobile device that must be charged for power via the supplied USB-C cable and power plug. To power the device, connect the "small" end of the USB-C cable to the power port on the bottom of the device, connect the other end of the cable into the supplied power plug, and insert the plug into a wall outlet.
- Press and hold the power button on the right side of the device until it powers on. When the device finishes powering on, the screen may display a SIM card info window. If so, select CLOSE on the pop-up to close it and proceed to the Welcome screen shown below.
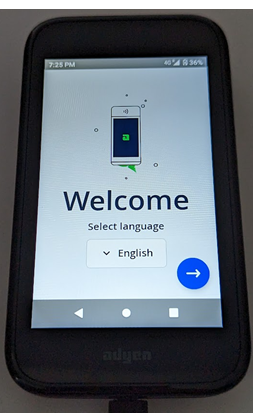
- Before you progress through the Welcome menus, follow the steps below to pair the device in Meevo.
Add or "pair" the credit card device in Meevo
With MeevoPay, you can add a device in Meevo even before you've received it! Shortly after your purchase of a device, MSI will associate the device with your account in our system. Once this is complete, you can actually add the device in Meevo before it arrives.
To pair a device, it must be associated with your MeevoPay account (this is done by MSI) and it must be unpaired (not activated) on any other accounts.
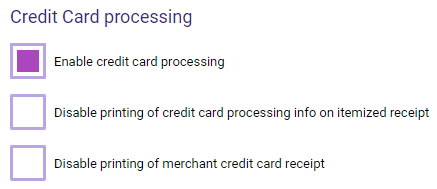
- First, make sure you've selected Enable credit card processing in the Register category of Business Preferences.
- Go to Meevo > Register > Merchant Accounts, or type merchacct into the Convobar.
- Search for and select the MeevoPay Merchant Account that will be tied to this device.
- Select the Devices tab.
- Select Add New. If a device is available to be paired, the Activate new device window appears.
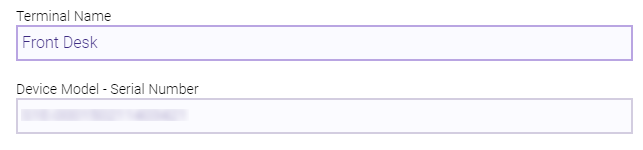
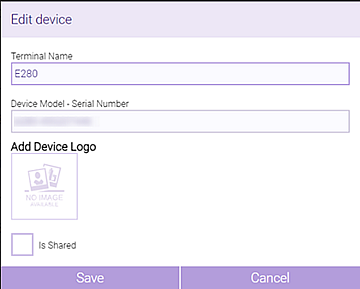
- Enter a Terminal Name, which is how you'll identify the device in Meevo. Give the device a name that will make it easy to identify in a menu or list, such as it's physical location (Front Desk, for example).
- Choose your Device Model - Serial Number from this drop-down. There is nothing for you to enter in this field; you only need to select the device serial number from the pre-populated list. If there are multiple S/Ns available in the drop-down, check the device's shipping box to make sure you select the right one.
- Is Shared: This enables multiple merchant account support for this device. The device becomes "shared" across all MeevoPay Merchant Accounts, meaning that it will appear in the Devices tab of all MeevoPay Merchant Accounts with (Shared) beside the Terminal Name. In this way, you can use one device for several Merchant Accounts.
- Display Transaction Details: When the option is enabled, supported terminals will display live transaction details (service name, shortcut, and price) as items are added to the Smart Receipt, replicating pole display behavior.
Reminder: A device appears in this list only if it's associated with your account and it is not paired (activated) in Meevo. If no devices are available to be paired, Meevo displays the message Please associate devices to this Merchant Account through your payment processor before adding them in Meevo.
- When finished, select Save to pair the device. The device appears immediately in the Devices tab.

- Now that you've paired your device with your Meevo Merchant Account in Meevo, you can connect the credit card device to the internet as explained in the next section.
Connect the credit card device to the internet
- On the AMS1 Welcome screen, select your language and then the blue arrow. The Setup Wi-Fi menu appears.
- Select Admin > Network > Wi-Fi and select the + icon to add a network.

- Toggle the Use Wi-Fi switch to On to view nearby wireless networks.
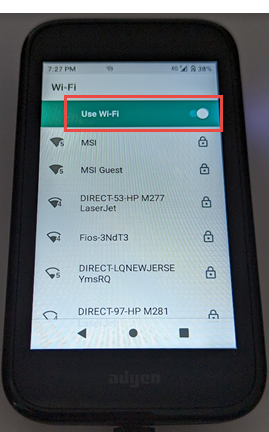
- Select your network and enter the Wi-Fi credentials. After a successful connection, a Wi-Fi signal strength symbol appears at the top of the display.
- Select the center O button on the device screen to return to the Home screen. The Home screen now displays your store location, address, and StoreID. Select the blue check to confirm this information if it is correct. If this information is inaccurate, select the "back" key on the device to return to the Home screen and then reach out to MSI Client Success for assistance.

- The device goes through its "boarding" process, which may take up to 30 minutes. The device may restart several times.
- When the Adyen home screen appears with a cloud icon in the upper-left of the device screen, your credit card device is ready for use!
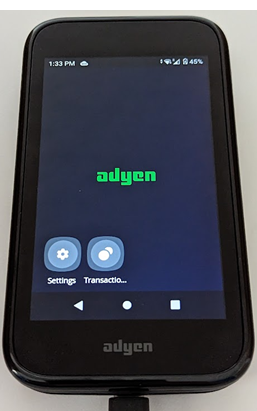
Note: If the device reboots into the Android Operating System instead of opening on the Adyen screen, tap the Adyen app on the home screen to correct this.
- Finally, you should assign your MeevoPay Merchant Account and AMS1 device as the default options for your desired register drawers.
Uploading a logo to your MeevoPay device
You can easily brand your MeevoPay device by uploading an image with the required dimensions.
- Select your MeevoPay Merchant Account.
- Select the Devices tab and then edit device.
- Upload your logo via the Edit device modal. Only .png files are accepted, and image size requirements (which can vary by device) must be exactly as listed in the "Help" pop-up window.

Note: To remove an image, simply select Edit Device and select the trash can beside the image.
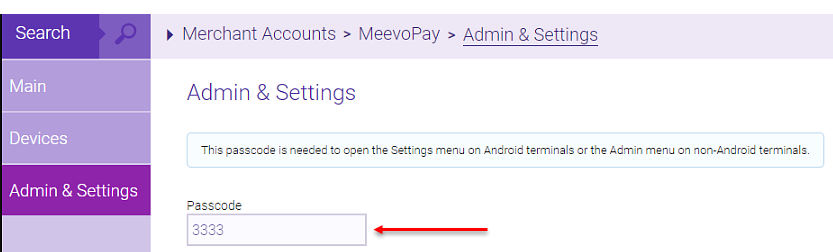
Obtaining your device passcode
MeevoPay credit card devices require a passcode to access their advanced menus: a passcode is needed to open the Settings menu on Android devices and to open the Admin menu on non-Android devices. You can quickly obtain your device passcode by selecting the Admin & Settings tab on a MeevoPay Merchant Account screen. When you select this tab, Meevo checks your device and displays the device's latest passcode. The device passcode is editable from this tab as well, so you can easily change the passcode if needed for security reasons.