Executing a Contingency Plan for Loss of Internet
Many businesses rely on their internet connection to collect revenue and stay productive throughout the day. Running a business on cloud-based software like Meevo requires you to be constantly connected to the internet, so any downtime – even for a short period – can be very disruptive.
Below are some steps you can take to continue running your business, even after loss of internet.
Note: These steps assume that the preparation steps described in the previous sections have been implemented in Meevo, and that you still have an internet connection via a mobile device using cellular data.
Step 1: Verify that Your Network is Down
Firstly, verify that your business network is down by attempting to open any other website, such as speedtest.net.
- If you cannot access any other sites, then it is likely that your network is down.
- We also recommend checking the User Community on Facebook to see if others are experiencing the same issue. If others are reporting a similar issue, we suggest not flooding Support with additional calls, and instead monitor the User Community for up-to-the-minute updates.
- If your Meevo appears to be down and the User Community has not yet reported it, please call Meevo Business Support right away at 973-402-8801 and let us know!
Step 2: Use Mobile Devices to Run Meevo
With your network down, you can still access Meevo using cellular data (not Wi-Fi or a “wired” local connection). This is easy to do by simply navigating to your business’s Meevo website on a mobile device; your business URL should be bookmarked, as suggested previously.
Important: If you are using IP Restrictions in Meevo, those will likely need to be removed. IP Restrictions can limit users from accessing certain features if they log in from an IP address that is different from your business network address. Also, you may need to change your tip handling options to make sure transactions can be completed without a card swipe device.
To turn off IP Restrictions
- A manager or admin – someone with permission to access and edit IP Restrictions from an “outside” IP address – must be logged into Meevo. This can be a manager with a user override (same external rights as internal), or a Full Access User.
- Go to Business Settings > IP Restrictions.
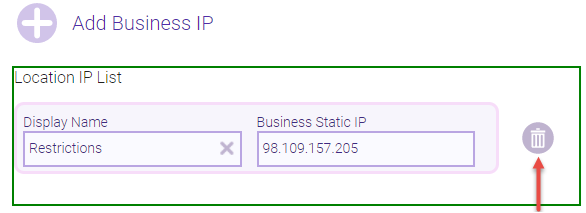
- Record any whitelisted IP addresses that appear in the Location IP List because you will soon be removing those. You’ll re-add these IP addresses once network connectivity has returned.
- Delete the whitelisted IP addresses by selecting the trash can beside the item. By deleting whitelisted IPs, you are allowing devices to log in from outside your network.
- With IP Restrictions now off, you should be able to log into Meevo from any IP.
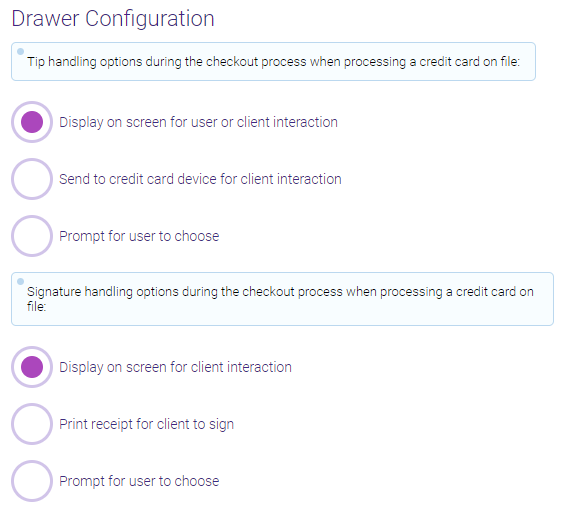
To configure tip and signature handling
- Type drawers into the Convobar to open the Drawers search screen. Select Search to locate the drawer you’re using and select that drawer.
- From the Drawer’s definition, set tip handling and signature handling to Display on screen. This ensures you are not relying on the connectivity of a credit card device to successfully complete a transaction with a card on file.
Step 3: Complete Meevo Transactions When Your Network is Down
Complete a transaction using any of the following methods:
Card on File
Using a client’s Card on File (CoF) is the quickest way to complete a transaction if your network or device is down.
- Clients who have a Card on File (CoF) appear with this icon beside their name in the register:

- After selecting Pay Now in the register, select the Card on File payment type.
- A list of available cards appears. You can search for other Client cards on file and select one of those as well, if needed. Select the desired card and select Add Payment.
- The next step is to add tip (if it has not been added already). This prompt will appear on-screen assuming you’ve set your Drawer's tip handling workflow options to Display on screen. Enter a tip and select Next.
- The client can add their signature on-screen, assuming you’ve set up your Drawer’s signature handling to Display on screen.
- After the payment is processed, the Smart Receipt is automatically updated to display the type of card that was processed, the last 4 digits of the card, and the amount. The Change Due window automatically appears when the transaction is complete.
- On the receipt prompt, select the option to Email the receipt.
Hosted Page
This is essentially a "virtual terminal" that allows you to complete transactions through the browser, so Hosted Page will be a selectable option in most places that Meevo asks you to select a terminal (Drawer definition, client profile's Credit Card tab, Drawer Manager, etc.).
- From the register Smart Receipt, select the Edit icon next to the Drawer.

- In the Drawer Manager on the register’s right pane, select Hosted Page from the Credit Card Terminal.
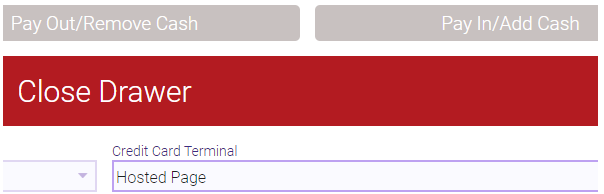
- Close the Drawer Manager by selecting the X in the top-right corner. This returns you to the register.
- If needed, you can add the tip now via the Add Tip button on the Smart Receipt. Note that you can also add a tip via the Change Due window that appears after processing the transaction.
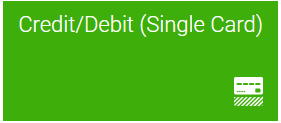
- When ready to finalize the transaction, select Pay Now in the register and then select the payment type. In this case, we recommend processing transactions with a Single Card, as Multi-Card purchases can slow down the process of ringing out clients via Hosted Page.
- After you select the payment type, the Hosted Page appears. Manually enter the Card Number and Expiration, and then select Process Transaction.
- After processing, the Change Due window appears. If needed, you can enter a tip by selecting Add Tip. When finished, select Finalize Sale on the Change Due window.
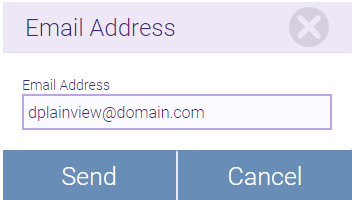
- On the receipt options window that appears, select the option to Email the receipt. If the client already has an email address on file, that address will be populated automatically. You can manually change this address, if needed. Select Send to email the receipt and finish the transaction.
Self-Pay
Meevo Self-Pay is another way to collect payment when your devices or internet is down. Self-Pay is a Payment Type that appears in the payment step of a register transaction.
- Select Pay Now, and on the payment step in the register, select the Self-Pay Payment Type.

- The Self-Payment screen appears.
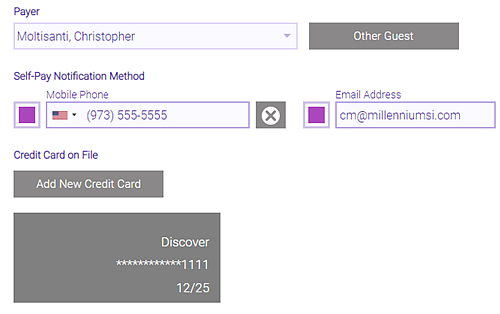
- Payer: This defaults to the Paying Client. If the paying client is different from who is listed here, you can select from the drop-down any of the clients who are on the transaction, or select Other Guest to select another profile.
- Self-Pay Notification Method: Select which notification methods to send to the client. You can select one or both methods. The Mobile Phone and Email Address fields default to what is in the client profile, but both can be edited here in the register for the purpose of Self-Pay. Changing a client's number or email here does not change it in the client’s profile.
- Credit Card on File: This section displays whether a client already has a card on file. As a matter of good practice, we recommend ensuring that clients using Self-Pay also have a card on file, though this is not required. Select Add New Credit Card to add a credit card on file for this client using the Hosted Page.
- When finished, select Send Self-Pay. A message appears informing you that the notification was sent, and the transaction is now on-hold and available in Return Transactions.
Step 4: What to do When Connectivity Returns
Depending on your situation, you may have to perform some or all of the following steps once you return to normal operation:
- Re-enable IP Restrictions: If you deleted your IP Restrictions, go to IP Restrictions and add the IPs that you recorded before they were deleted. See our IP Restrictions topic in Meevo Help for details.
- Revert Drawer Tip and Signature Handling Settings: Go back into the Drawer definition and set tip and signature handling back to your preferred options.
- Retrust Receipt Printers: Go to Register > POS Hardware and for any printers you have, make sure to click Trust.

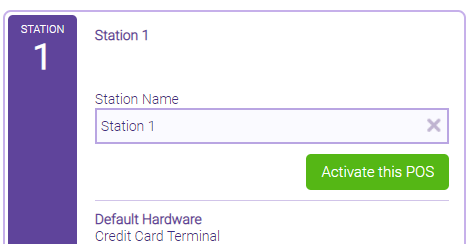
- Reinstate POS Stations: If you use POS Stations, and you cleared your browser cache, on each device, make sure to go to Register > POS Hardware and choose the POS Stations tab. On each station device, click Activate this POS for the correct POS Station.