Scheduling a Listings Update
You can configure a scheduled update as a one-time event, or as a temporary update that will revert back to its original content on a chosen date. We recommend scheduling certain updates, such as the Featured Message for a planned promotion.
To schedule an update
- Go to Meevo > Marketing > Online Presence Management or type onlinepresencemgmt into the Convobar.
- Select the Knowledge Graph > Entities and select your location.
- If necessary, select a language profile from the right pane.
- Under Scheduled Updates, select +Add an Update.
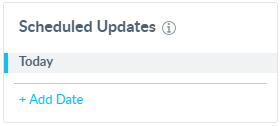
- Select a date on the calendar for the update to take place. For example, if you were scheduling a November promotion, you may pick November 1 as a start date. Select Create.

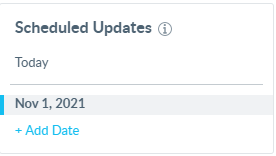
- The pop-up closes and you are brought back to the main Knowledge Graph page. You'll notice the new date on the right pane. It is highlighted, indicating that we are about to make an update for that scheduled date.
- In the middle pane, make your changes. For this example, we are updating the Featured Message. When finished, select Schedule Update.
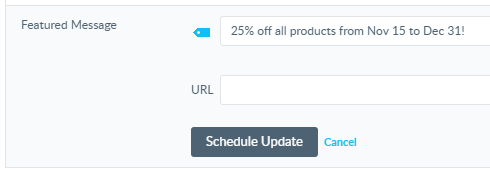
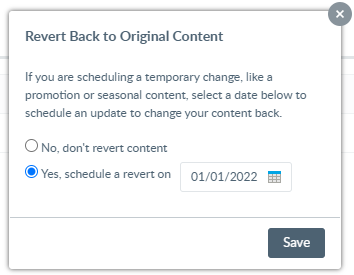
- In the pop-up window, select if this is a permanent, one-time change (No, don't revert content) or a temporary change that should revert back to its original content (Yes, schedule a revert on [date]). For our example, we are reverting back to the original content on Dec 1. When finished, select Save or Schedule Revert.
- On the right pane, you'll see dates for each update you've scheduled. Below, we see a date for the update, as well as a scheduled date for when it will revert. You can repeat these steps to schedule any additional edits. Just make sure that the correct schedule date is highlighted on this pane when making changes.
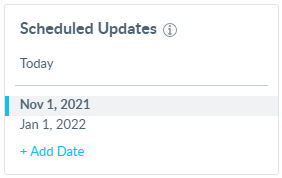
- At any time, you can select one of the dates on the right pane to view those scheduled updates in the applicable field. Scheduled updates appear with a thick gray border and the words Scheduled Update below the field name.

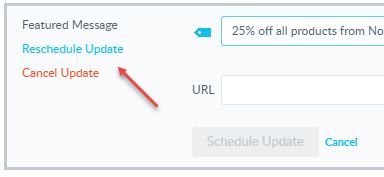
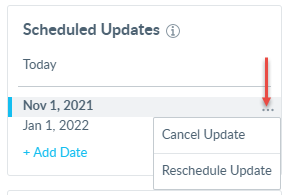
To reschedule or remove a scheduled update
To reschedule or remove a scheduled update:
- Select the three dots to the right of a date to view a drop-down of options for that date.
- Select the scheduled update in the middle pane to enter edit mode, and then select one of the options in the top-left of the section.