Customizing and Sending an Email Campaign
Campaigns are one-time mailings that target a specific segment or group. For supporting information on developing successful campaigns, review the Email Marketing Help topics 4 easy ways to promote your campaigns and 3 Ways To Use HTML Code In Your Campaigns.
Be sure to review our Email Marketing FAQs, where you can find guidance on creating various types of campaigns.
Email Campaign "How To's"
- How do I create a one-time email campaign for an employee’s client list if they are going on maternity leave or no longer work at the business?
- How can I create a one-time email campaign for clients who have not visited in a certain amount of time and do not have future appointments scheduled?
- How do I create a happy birthday automation?
- How do I create a we miss you automation?
- How do I set up an automated campaign to welcome new clients?
To customize an email campaign
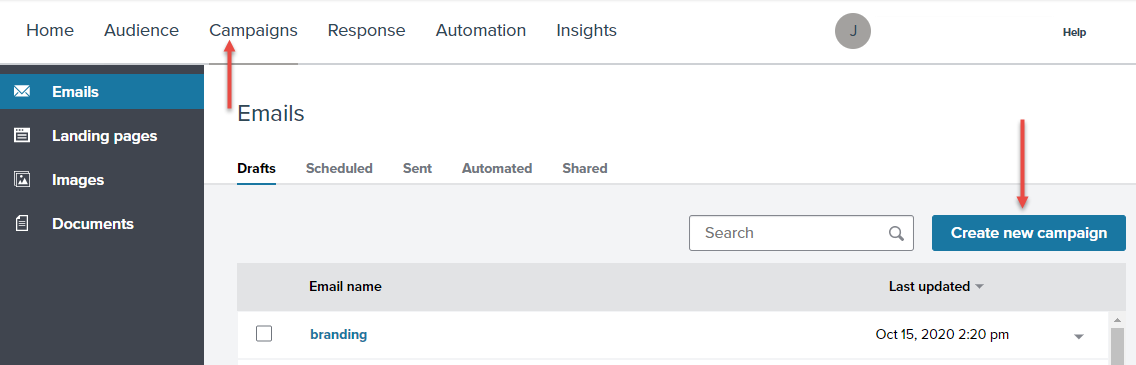
- Select Campaigns. The screen opens to your Emails > Drafts list by default. Select Create new campaign.
- On the Create new campaign window, choose the campaign type:
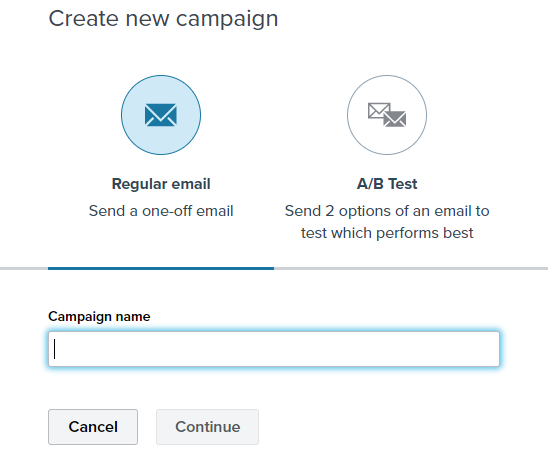
- Regular email: Configure a one-off email. You can select and customize a template that best speaks to your target clients. We provide a number of pre-made templates designed by Millennium Systems International's talented Marketing team. You also have the ability to create your own template by selecting Blank Template under the Campaign tab. Proceed to the next step for more details on creating a regular email.
- A/B Test: With content split testing, you can test two different existing mailings against each other with a portion of your audience. The mailing with the highest response will be sent to the remaining recipients. For additional details, you can also review the Email Marketing Help topic How To Create An A/B Test For Your Campaigns.
- If you're creating a new Regular email campaign, you are brought to the Choose template screen. For more details, you can review the Email Marketing Help topic Email Campaign Template Options.
- To use the Template Gallery: Your default view on the Choose template step is the Template Gallery, where you can choose from over 200 beautifully designed templates, organized by the type of campaign. Use the navigation in the left pane to view categorized templates under My gallery and Sample gallery. Once selected, you can customize the template using the Drag & Drop editor.
- To use a blank template: To begin with a blank template (non-HTML), select Start from scratch in the top-right corner, and then select Drag & Drop.
- To code your own template: This option is only for those experienced with HTML code. Use this option to add your own HTML code to determine the design and content. Select Start from scratch in the top-right corner, and then select Custom HTML. For additional details, you can also review the Email Marketing Help topics Using a Code Your Own Template and Template Style Controls for CYO Campaigns.
- After selecting your template, you can use the Drag & Drop editor to adjust the verbiage, imagery, icons, and much more. For additional details on the Drag & Drop editor, see Email Marketing Help topics What's Changed in the New Editor and these Quick How-To Videos.
Note on the Drag & Drop editor: In March 2022, we introduced the new and improved Drag & Drop editor. The previous editor you are used to working in is now referred to as the “legacy editor.” Going forward, only the new Drag & Drop editor can be used to create new campaigns. When you reopen any of your previous legacy campaigns, you will still have access to the legacy editor to continue working on those campaigns, but you will be unable to create new campaigns using the legacy editor. Your saved campaigns will be labeled accordingly with LEGACY or DRAG & DROP. - Once you're finished, select Preview. Be sure to preview all of the views to ensure your campaign looks good across all devices. Then, select Back To Editor.

- Select Send Test to send a test email.
Tip: Always send a test email to yourself before sending to your clients.
- Enter your email address in the To field.
- Select Send Now.
- When ready to send, select Review & Send. The proofing window will appear while Emma finalizes your campaign.
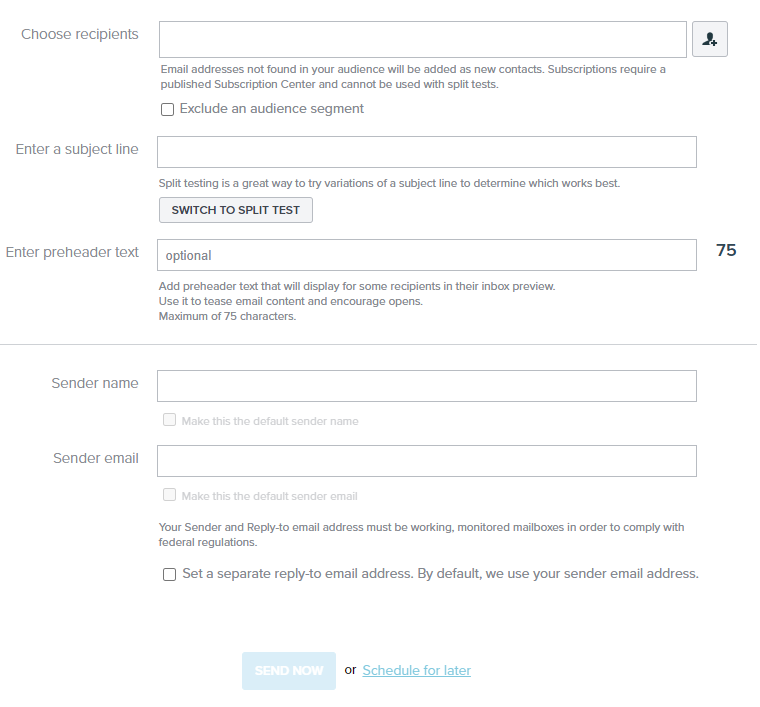
- Under Choose recipients, tie the appropriate Segment to the campaign.
- Enter a Subject Line and Preheader Text.
- Enter the Sender name and Sender Email.
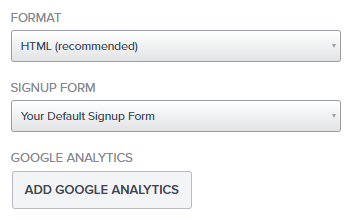
- Make sure the correct FORMAT and SIGNUP FORM are selected.
- It’s time to send your email campaign! You can:
- Select Send Now to send emails out right away.
- Select Schedule for later to send at a later date or time.
Sharing a campaign between locations
It is possible to share campaigns between locations, but first you'll need to reach out to MSI so that we can establish some permission options on our end. Once that's complete, your Campaigns tabs will be updated and you will be able to share campaigns across locations:
- Head to the Campaigns tabs and select your Campaign type (Draft, Sent, or Scheduled).
- Each campaign has a drop-down menu. Select the menu for the campaign, and select Share to Subaccounts.
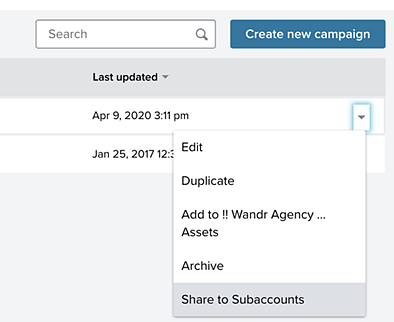
- A preview of the shared campaign will be included in the Shared tab under Campaigns in the destination location. Select the locations you wish to share to, and select Share.
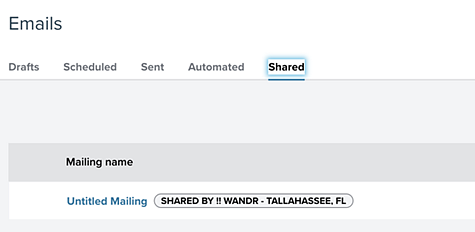
- Once a campaign is shared, it will be included in the Shared tab under Campaigns. Shared campaigns include an indicator as to which location it was shared from:
- Selecting a shared campaign from the Shared tab opens the editor used to create that campaign. Locations can make changes to the campaign and send as needed.
- Here are some additional notes on sharing campaigns across locations:
- Campaigns do not appear in Brand Manager.
- Changes made to shared Campaigns are not propagated down to the destination locations. Updated campaigns need to be shared again for the destination locations to receive them.
- Images in a shared campaign will be included in the destination location's image library, but only if the image is edited in some way.