Booking Appointments Using Booking Agent
To get to Booking Agent, type bookingagent into the Convobar, or go to Meevo > Appointments > Booking Agent.
Note: You can also open the Booking Agent from the Appointment Book hamburger menu.
To select a location
Location Search: In the Location Search field, enter the location name or search for the location.
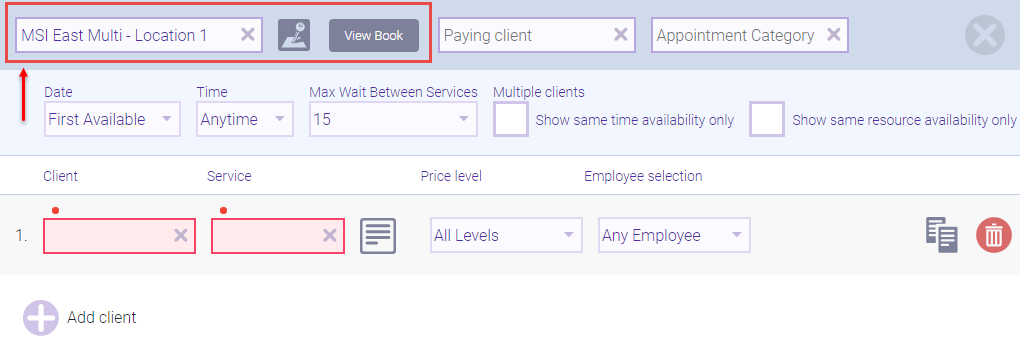
When you select a location:
- Meevo places you in Agent Mode, which allows you to book appointments and perform other actions according to your security in that location. After you select a location in Booking Agent, the location in the top-left corner changes to your selection and becomes red with a hashed border, indicating that you are in Agent Mode.
Note: Be sure to review Booking Agent for important information on using Agent Mode.
- The first appointment row is automatically created in the bottom pane.
- The View Book button appears at the top row of the screen. Selecting View Book allows you to view the selected location's Appointment Book.
To set criteria and scan for openings
- Paying Client: The client you enter here will receive all notifications for the appointment rows that you're booking through Booking Agent.
- Appointment Category: This is an optional field that provides additional information about the appointment.
- Enter your search criteria:
- Date and Time: These details determine the dates and times that Scan for Opening will look at. Scan for Opening will produce results for the first 14 days of any date range. If you select a specific time range like Morning Before 12 pm, the entire appointment must fit in that time range. If a service would extend past the range (12 pm in this example), then Scan will not return openings.
- Max Wait Between Services: The maximum wait time between services for clients booking multiple services.
- Show same time availability only: Select this option if multiple clients wish to book appointments that start at the same time.
- Show same resource availability only: Select this option if multiple clients wish to have their appointments in the same resource.
- In the bottom pane, select the Client and the Service.
- After selecting the service, a second line appears, with the client name auto-populating the Client field. This allows you to quickly add additional services. If a second service is not needed, select Delete Client to remove that line.

- To add another line with the same client, select Copy Client.
![]()
- To add a new client, select Add Client and complete the fields in the new row.
- Price Level: If anything other than All is selected, Scan for Opening only returns employees who perform the selected service at the selected level.
- Employee Selection: If anything other than All is selected, Scan for Opening only returns the selected employee type.
- Any Female Employee: If the appointment is booked, Female Preferred appears in Appointment Editor.
- Any Male Employee: If the appointment is booked, Male Preferred appears in Appointment Editor.
- Specific Employee: If the appointment is booked, No Preference appears in Appointment Editor.
- When ready to scan for an opening, select Scan.
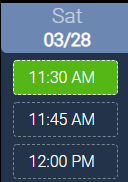
To book an appointment from scan results
Note: At any time, you can select Add to Wait List to add this request to the Wait List, or Missed Opportunity to add this as a missed opportunity.
- On the result screen, each available opening is displayed in a day and date column.
- You can refine your search using the Date, Time, Max Wait, and Show Same Time/Resource options in the top pane, and then selecting Rescan.
- Select Edit Details to return to the Booking Agent and change the Client or Service.
- Select Clear All Filters to start the form over completely.
- Select your desired opening. A confirmation window appears with the details of the appointment.
- Select Yes to add this appointment to the Appointment Book, or select No to return to the Booking Agent without booking the appointment.