Syncing to QuickBooks Desktop
IMPORTANT: If this is your first time syncing with a new connection, you must follow the steps in Before syncing for the first time to ensure smooth and accurate accounting with the QuickBooks Online Integration.
Before syncing for the first time
Before your first sync a new connection, you need to populate some starting data in QuickBooks to ensure accurate accounting.
- Meevo Cash Drawer account: In QuickBooks, enter the starting cash amount for all cash drawers. This only needs to be done once. Since you are defining the opening cash in QuickBooks, it is highly recommended that you open and close your drawers with the same amount each day. Failure to do so may result in inaccuracies.
- Meevo Inventory Asset Account: In QuickBooks, enter the total value of all inventory. Run the MI210 report in Meevo to obtain this value, provided you've recently performed an Inventory Count and are confident in your data.
Note: As a reminder, always be sure to account for additional product received by your business by adding received products' wholesale back into the Inventory Asset Account in QuickBooks. As a best practice, we recommend doing this before your next sync, though in theory this can be done at any time.
To sync to QuickBooks Desktop
Reminder: To sync, you must have an established connection to QuickBooks Desktop and configured accounts and Payment Types. Also note that you cannot sync if there is an Accountant Copy of the file.
Meevo never auto-syncs with your QuickBooks account. The only way to push your Meevo financial data into QuickBooks is to sync by following the instructions below.
When you execute a sync, your data is added to a queue for the QWC to process. Your data is not synced to QuickBooks until the QWC processes the queued job. You can manually run the QWC to quickly run the queued job, or wait for it to auto-run. You can configure auto-run settings via the QWC window, but note that the Web Connector window must be open in order for it to auto-run.
- In the QuickBooks Desktop Integration screen in Meevo, select the Sync tab.
- Select a QuickBooks connection to sync: Choose the desired connection if you are using multiple connections. Otherwise, this defaults to your only connection and cannot be changed.
- Sync: Enter the From and To dates. As a best practice, MSI recommends setting the To date to at least 16 days prior to today, as this is the maximum number of days in the past that transactions can be edited (as defined under Transaction Editor Settings in a Security Role definition). We recommend looking up what this is set to in Meevo and making sure the To field is always at least that many days prior to today. This duration should be considered when syncing to QuickBooks, as you want to avoid syncing data that has the potential to be changed in Meevo.
Note: Data that is changed in Meevo after a sync is not retroactively pushed to QuickBooks. See Best Practices for the QuickBooks Integration for details on how editing a past transaction can impact your synced QuickBooks data and the steps you should take to resolve any discrepancies.
Some more notes on sync:
- You can sync as many times as you want on a given day, but you cannot sync a date or date range more than once; attempting to do so will display a message that explains the dates were already processed. If the date or dates were deleted, then a sync can happen again.
- If you are re-syncing previously synced dates, first consider any deposits that may have been created as a result of the original sync and modify your deposit data accordingly.
- You can only have one queued job at a time.
- All drawers must be closed in order to sync. You cannot sync if a drawer is open in Drawer Manager.
- Sync range can be up to one month, and you can go back as far in the past as needed.
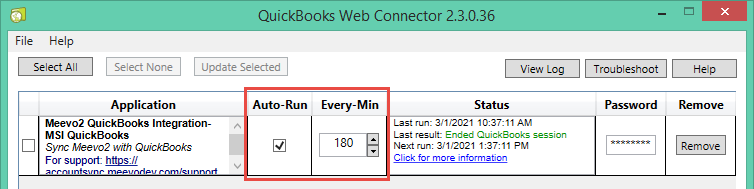
- When ready, select Send to Queue. After a few moments, you receive a successful message that the data was submitted to the queue.

- Next, select the Queue tab to view the sync queue.
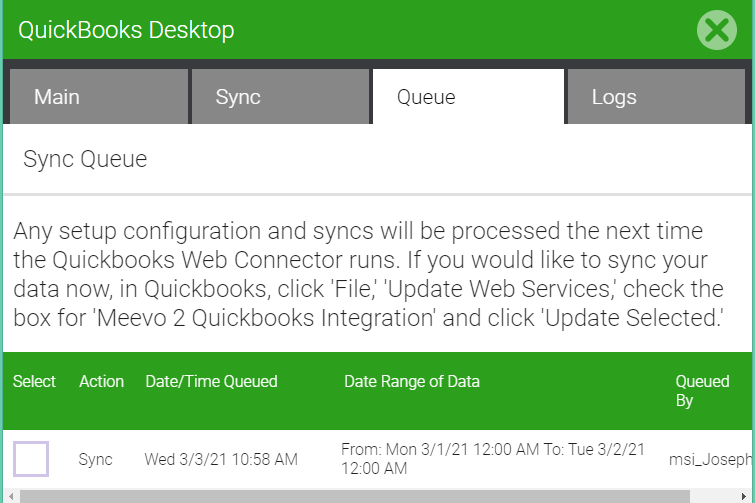
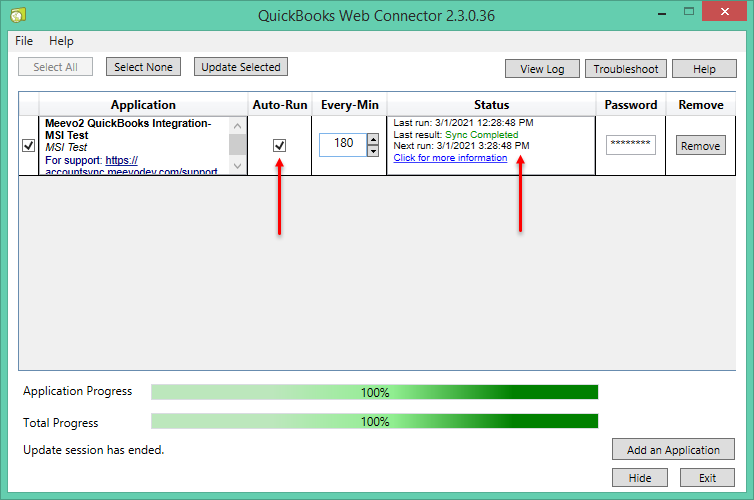
- To force the sync immediately, go to QuickBooks Web Connector, select the integration, and then select Update Selected.
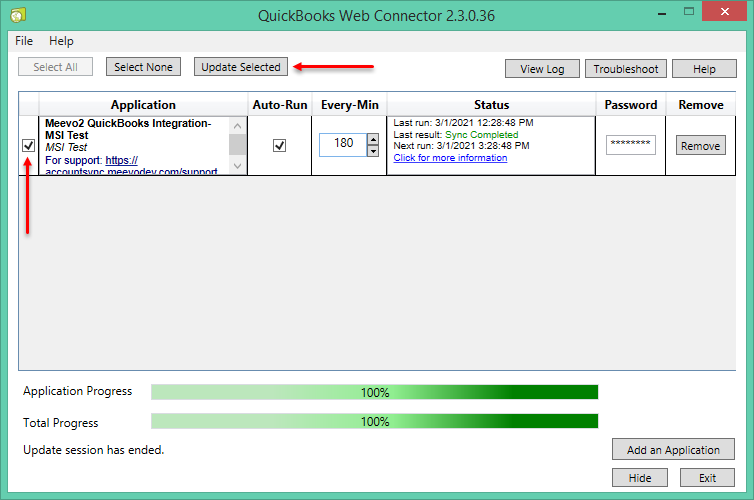
- Otherwise, if Auto-Run is enabled and the QWC is open, every three hours the QWC will check for any queued jobs and run them. You can see the next scheduled run in the Status column.
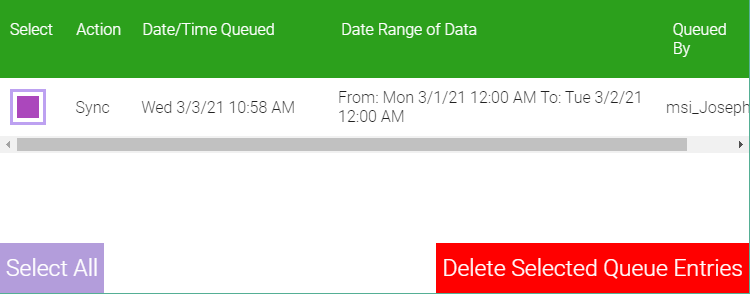
- To delete the sync before the data is sent to QuickBooks, you must remove the sync from Meevo. In Meevo, go to the Queue tab, select the sync you wish to remove, and select Delete Selected Queue Entries.