MR100: Transaction Log
The MR100 report is a detailed list of transactions that were processed in the date range and that match the selected filters such as Completed/Refunded/Voided/Edited Transactions, an option to display Transaction Notes, and more.
Tip: Run the MR100 to help investigate reasons behind overages and shortages in the cash drawer.
Report definitions
Header row across top of report
- Client: The name of the client that the item was sold to.
- Qty: The quantity of the item that was sold.
- Item Type: The item that was sold. A = Add-On; Fee = eGift Processing/Shipping Fee; S = Service; P = Product; Pkg = Package; GC = Gift Card; MGC = Multiple Gift Card; MEM = Membership Based Sales (Enrollments, EFTs, Renewal etc.); PPR = Payment Plan Reduction; PPP = Payment Plan Payment/EFT
- Item: The Display Name of the item that was sold. If Product Usage Tracking is enabled, the amount used is also listed. This data will always appear on the MR100, even if Product Usage Tracking is turned off.
- Performed/Sold By (Split %): The employee who was credited with the sale, along with any split commission. Also includes the Assisting Teacher if applicable.
- Discounts: Discount amount; if a single discount was used, its Display Name will also be listed.
- Line Total: The price of the item that was sold, not including tax.
- Line Tax: The tax that was charged on the item.
Transaction row
- Transaction #: The transaction number as it appears in Transaction Editor.
- Date/Time: The date and time that the transaction was completed.
- Drawer: The Display Name of the drawer that was used in the transaction.
- Created By: The user who first created the transaction. This is not necessarily the user who finalized the transaction.
- Completed By: The user who finalized the transaction.
Totals section
- Total Service Charges: The sum of all service charges on the transaction.
- Total Discounts: Total amount of discounts applied on the transaction.
- Tips: The amount and employee who received the amount. Note that this does not include House or service charge tips.
- Tax Collected: Displays all tax collected on the transaction.
- Less Gift Card Usage: The sum of all Gift Cards that appear in the report.
- Pck Adjustment: The sum of all Package Adjustments that appear in the transaction.
- Tendered: Displays each Payment Type and amount used on the transaction.
- Surcharge: This is the surcharge amount applied to the transaction. Surcharges are available for MeevoPay Merchant Accounts only.
Setting up the MR100 report
- Type MR100 in the Convobar, or go to Meevo > Reports > Register/Sales, and then select the MR100 report.
- Select a date or date range for running the report:
- To run a report for a specific date range, select Custom and specify the Start Date and End Date for the report.
- Otherwise, select a predefined date or range (Yesterday, This Week, Last Week, etc.).
Note: If you select a predefined range (a date other than Custom), you can still change the Start Date and End Date. Doing so automatically changes the date range to Custom.
- Start Time and End Time: Specify the time range that Meevo should look at for sales. Select Full Day to quickly set the times to a full day.
- Open/Close History: Select to display a pop-up window of drawer openings and closings for your selected date range. In that window, select a row and OK to set the dates and times to capture that specific action.
- Display Transaction Numbers: Sort transactions by Ascending or Descending transaction numbers.
- View Completed/Refunded/Voided Transactions: Select to display transaction details for that type.
- Display Edited Transactions Only: When selected, the report will display only edited transactions. The transaction types (Completed, Refunded, or Voided) that display depend on what is selected in Step 6 above.
- Search for transactions that contain a specific service or product: Enable this option to reveal controls that allow you to search for one or more specific services or products. The report can be run for only one Item Type (services or products) at a time.
- Client Search: Select one or more clients to report on. If you do not select a client, Meevo will report on all clients.
- Display Transaction Notes: Displays any transaction notes that were added to the transaction.
-
All Employees: Enable this checkbox to run the report for all active employees within the date range, including data from terminated employees. Or, to run the report for specific employees, deselect the checkbox and use the drop-down to select employees or Employee Categories. You can show or hide terminated employees in this list. Note the All Employees "bubble" in the Employee list selects all employees in that list; it is not the equivalent of selecting the All Employees checkbox.
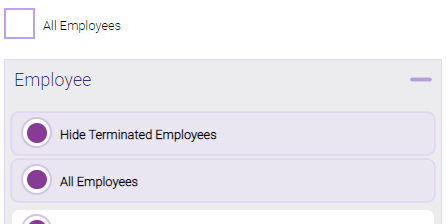
Note: Selecting All Employees will also return any data tied to the House employee.
- All Students/Teachers/Teachers (Assisting): These options are for businesses using our Students & Teachers feature. This selector functions exactly like the All Employees selector.
- All Created By Users: Define which users to include in the report. If you deselect All Created By Users, use the list to specify who to include.
- Combine Drawer Totals: When selected, all drawers are totaled together. When not selected, each drawer is totaled on its own.
- All Drawers: Select All Drawers to run the report for all register drawers. Otherwise, deselect the option and use the list to select the drawers.
Running the report
- When you are ready to generate the report, select a Report Format beside the Run Report button.

- Here is a rundown of each format type:
- PDF: Each time you select Run Report with PDF selected, Meevo opens a separate browser tab that displays the PDF'ed report. Meevo remains on the setup page, so you can quickly jump back over to Meevo to run more date ranges or other reports. Each PDF report you run will open its own browser tab, so you can easily review and compare reports by simply jumping between browser tabs.
Note for viewing on iOS: If viewing a PDF on a mobile device running iOS, swipe from left to right on the screen to return to Meevo. - HTML: This is our original legacy format, which opens the report within Meevo. All of the functionality within that report is still there and available via the toolbar.

- XLSX: Each time you select Run Report, your browser auto-downloads the report in .xlsx format. Select the downloaded file in the browser footer to open the spreadsheet.
- PDF: Each time you select Run Report with PDF selected, Meevo opens a separate browser tab that displays the PDF'ed report. Meevo remains on the setup page, so you can quickly jump back over to Meevo to run more date ranges or other reports. Each PDF report you run will open its own browser tab, so you can easily review and compare reports by simply jumping between browser tabs.
- Select Run Report to generate the report in your chosen format. Depending on the type of report and criteria you entered, this process may take a few minutes.