About Self-Pay
Self Pay allows clients to seamlessly and safely pay bills using “contactless” payments that can be made from outside your business. The Self-Pay method is a payment type that is available during the Payment step of a register transaction.
What are the requirements for using Self-Pay?
- For the Self-Pay tile to appear as a payment type, your default Merchant Account must support Hosted Page and card tokenization (Enable Hosted Page does not need to be enabled on the Merchant Account definition). All Self-Pay payments go this default Merchant Account.
- You must have Enable credit card processing turned on in the Register section of Business Preferences.
- Email and text message notifications must be turned on as well, but it is not necessary for clients to be opted-in to receive Self-Pay emails or text messages.
Note: To account for late-night or early-morning appointments, Self-Pay notifications are not affected by Meevo Blackout Times.
Can I turn the Self-Pay payment type on or off?
By default, Self-Pay is an available payment type in the register if the above requirements are met. Access to this tile can be controlled via a security key, just like the other payment type tiles: Register > Register > Payment Type Access > Self-Pay. Note that providing Grant access to the Self-Pay payment tile will override the On Hold > Put transaction on hold security key setting.
Are there any options for Self-Pay?
In Business Preferences, under Register, there are options for setting Self-Pay transaction defaults.
In Notification Templates, you can customize the Self Pay - Initial and Self Pay - Reminder notifications and then select them in Notification Settings.
Can a client add a card on file via Self-Pay?
Yes! If the client does not have a card on file and you are allowing Self-Pay clients to store cards on file, they can select Securely store credit card for future use to add the card to their client profile. The business can also add the card manually by selecting Add Card on File in the register before sending the Self-Pay transaction.
How do I use Self-Pay in the register?
Select the Self-Pay payment type as described here.
Can I use Self-Pay to take a deposit over the phone?
Yes! While on the phone with the client, create a transaction in Meevo:
- Create a transaction for the client, placing a credit on their client account in the amount of the deposit.
- Select Pay Now and select Self-Pay as the Payment Type.
- Fill out the required information and select Send Self-Pay when finished.
- After the client pays the bill via Self-Pay, the funds appear on their client account.
- Once the client receives the service and is ready to pay, make sure you apply the account credits (deposit) to the transaction.
How do clients receive their bill?
During the transaction, you'll choose Self-Pay and decide whether to send the client an email, text message, or both. Regardless of which you choose, both notifications that go to a client include a link to a web page, where the client can view transaction details and process the payment. It is not necessary for clients to be opted-in to receive Self-Pay emails or text messages.
Can a client still tip on a Self-Pay transaction?
Yes, tips can be applied in the register when the transaction is being rung up, and the client also has the ability to adjust the tip during the self-payment step.
Can a client partially pay at the register and still use Self-Pay payment method?
Yes, the client can partially pay using any other payment type except for Cash or Check. Once Cash or Check is applied to a transaction, Self-Pay will no longer be available unless the Cash or Check partial payment is removed from the Smart Receipt.
What do Self-Pay transactions look like in Meevo if sent to the client but not yet paid?
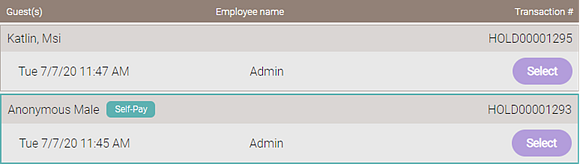
Unpaid Self-Pay transactions appear under Return Transactions in the register and have a Self-Pay indicator and outline. These Self-Pay transactions will remain in the Return Transactions list until action is taken on them in Meevo. Once a Self-Pay transaction has been on hold for 7 days, you will be unable to resend the link to that transaction.
![]()
These on-hold transactions can be managed in the register just like any other. If you No Sale the transaction, clients who click their Self-Pay link will be presented with a message that the transaction is no longer available, and to contact the business with any questions.
For how long is the Self-Pay link valid?
By default, Self-Pay links that are sent to clients are valid for 168 hours (7 days) from when they are sent. This validity window is a configurable setting in the Register section of Preferences.
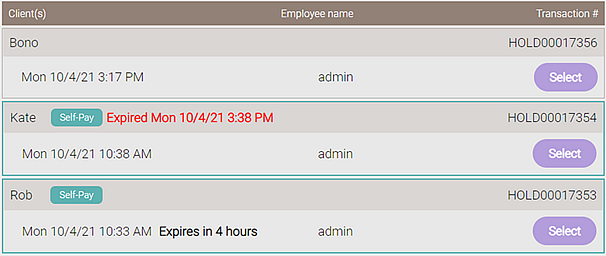
If a link expires, the Self-Pay transaction will remain on-hold in Meevo, but the client will not receive a new notification automatically as a result of the link expiration. The Return Transaction list indicates which links have expired and which links are due to expire within 8 hours or less.
How do I resend the Self-Pay link?
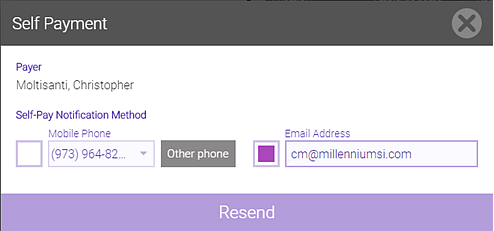
Select the Self-Pay icon on the on-hold transaction. From this pop-up window, you can modify the email or phone number if needed, and then resend the link. Note that resending a link does not change when the "reminder" notification will be sent, as that is determined when the initial Self-Pay notification goes out to the client.
How do I send a link to a client if the Self-Pay transaction has been on hold for 7 days or more?
Once a Self-Pay transaction has been in the Return Transactions list for 7 days beyond the date stamped on the on-hold transaction, you will be unable to resend links. In the example below, the Self-Pay On-Hold transaction was created on 7/7/20, so it expires one week later, or 7/14/20.
To send a new link to a client, return the on-hold transaction and go through the Self-Pay steps described here to send a new link. By doing this, you create a new on-hold transaction, essentially "resetting" the 7-day countdown of a Self-Pay on-hold transaction.
What is the client experience when using Self-Pay?
Note: Self-Pay does not support multi-card transactions.
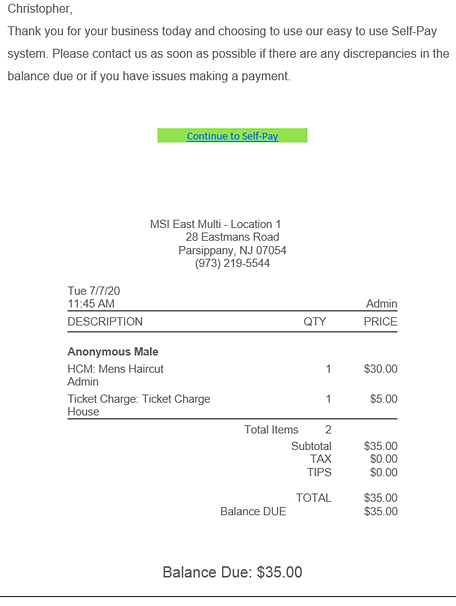
- Either notification a client receives will include a link to a web page, where the client can view transaction details and process the payment. The text message contains only a link, while the email (shown below) includes a copy of the unpaid receipt.
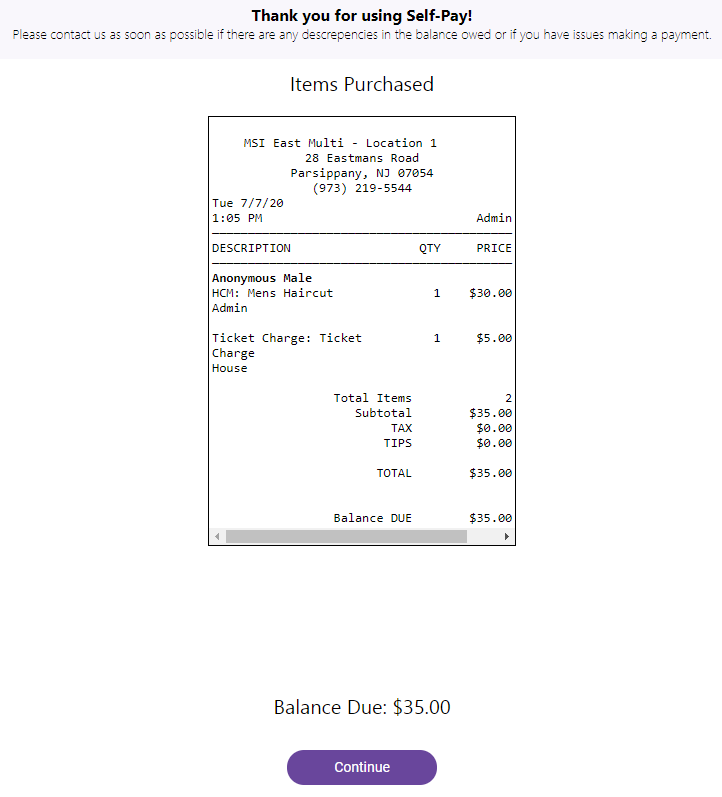
- Selecting the link brings the client to a web page that presents the itemized receipt, the amount due, and any payments or tips already made on the transaction.
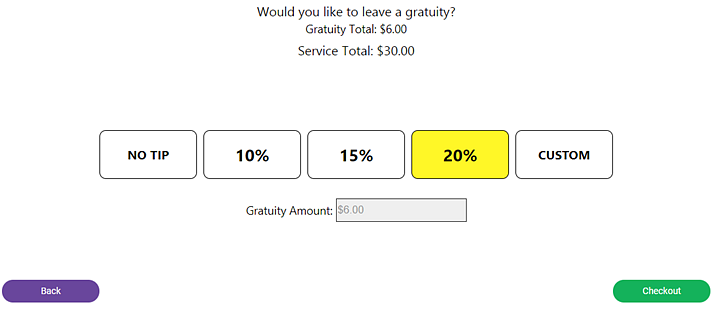
- Selecting Continue brings the client to the tip step (if tips are enabled), where they can add a tip if necessary. Any tips already added to the transaction will also appear here, and prepaid tips are also considered in this step.
- At the Checkout step, if the client has a card on file, that card will be automatically selected. The client can select Change to enter a different credit card, if desired. If the client does not have a card on file and you are allowing Self-Pay clients to store cards on file, they can select Securely store credit card for future use to add the card to their client profile. When ready, the client selects Process Transaction.

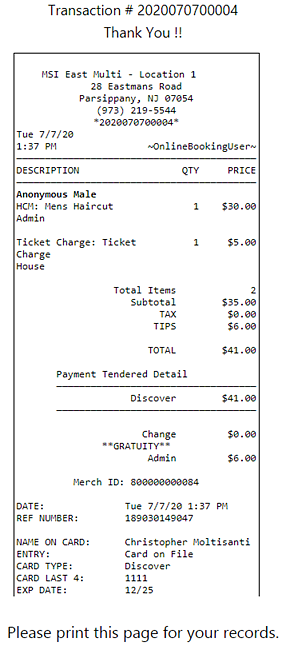
- Upon completion, the client is taken to a Thank You page that lists the transaction number and a copy of the final receipt.