Scheduling a Location Transfer to a New Market
This topic explains how to move locations between markets. The steps below apply whether you've just created a new market and need to define its locations, or you wish to refine the locations within existing markets.
Note: Central Office cannot be removed from the default (base) market.
- Locate and select the market.
- Select the Locations tab. The screen lists all locations currently in that market, if any. You can use the drop-down to filter the location list by Location Group.
- Select Schedule Location Transfer. The location transfer page appears.
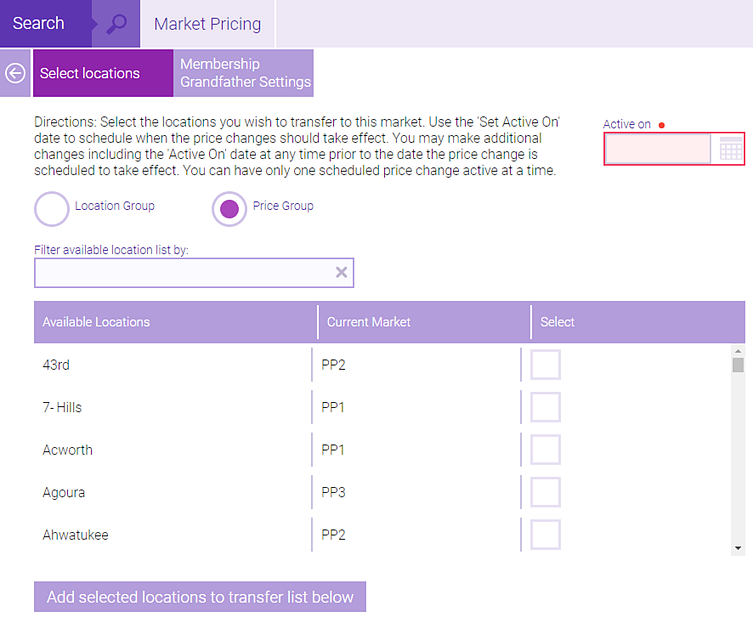
- Set the Active On date; the location transfer will occur at 1 am EST of the day you select here. If you select today's date, the location transfer will occur overnight tonight and be reflected in Market Pricing tomorrow.
- Location Group or Price Group: The selection here determines what appears in the Filter available location list by drop-down. Location Group lists the Location Groups, while Price Group lists all existing markets.
- All locations and their current markets appear in the table. Use the Filter available location list by drop-down to narrow down the location list, if necessary.
- Select Edit and then select the locations you wish to transfer from the Select column.
- Select Add selected locations to transfer list below. The locations appear in a table below, again displaying their current markets. Remember, after you save, the locations listed here will be transferred to the currently selected market on the configured Set active on date.
- Select Save.
- Next, configure membership grandfather settings to decide if clients with memberships should continue with their current membership prices and benefits or inherit the prices from the new market.