Using the Smart Receipt
The Smart Receipt displays all the information you need during a transaction, including the current drawer in use, prices, client, servicing employee, and more.
Smart Receipt: top section
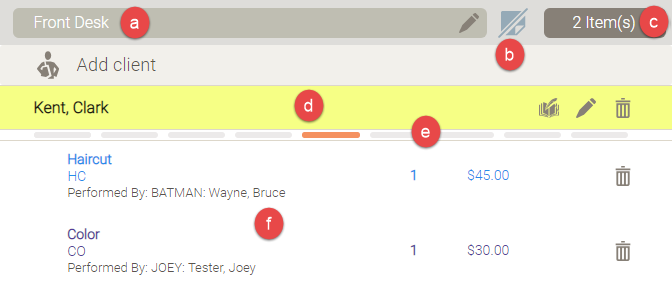
- The currently open drawer. Select the edit icon
 to open the Drawer Manager in the right panel, where you can perform actions on the drawer such as close, pay-in, etc.
 - Select this note icon to add a transaction note.
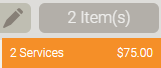
- This displays the number of items on the Smart Receipt. Select this button to reveal the total.
- Left side: The name of the client who received the services. Select Add Client above the client name to manually add another client to the receipt.
Right side: Action items you can take on the client in the Smart Receipt, from left to right, are: open client history, change the client in the Smart Receipt, delete the client in the Smart Receipt.

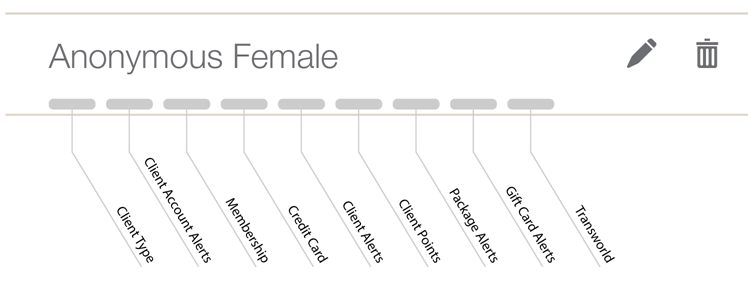
- Client indicators, which appear as colored dashes when minimized (shown above), and expand to reveal additional indicators when maximized. See below for each possible indicator (colors may vary based on status).
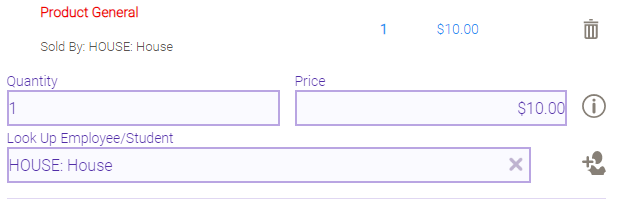
- The items currently on the Smart Receipt. Select an item to reveal a drop-down with additional options, such as Quantity, Price, and the employee credited with the sale. Products on the Smart Receipt whose on-hand count is less than the order point will appear in red text.
Smart Receipt: bottom section
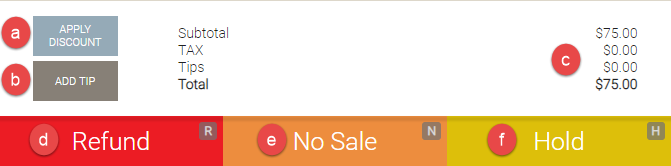
- Select APPLY DISCOUNT to manually apply a discount.
- Select ADD TIP to manually add a tip to the transaction.
- The transaction sub-total and total, including tax and tips.
- Select Refund to initiate a refund.
- Select No Sale to cancel the transaction without saving.
- Select Hold to place the transaction on hold.