Configuring MyMeevo
Updating MyMeevo to match your company branding
Under MyMeevo > Branding, you can configure color schemes for various elements in the app.
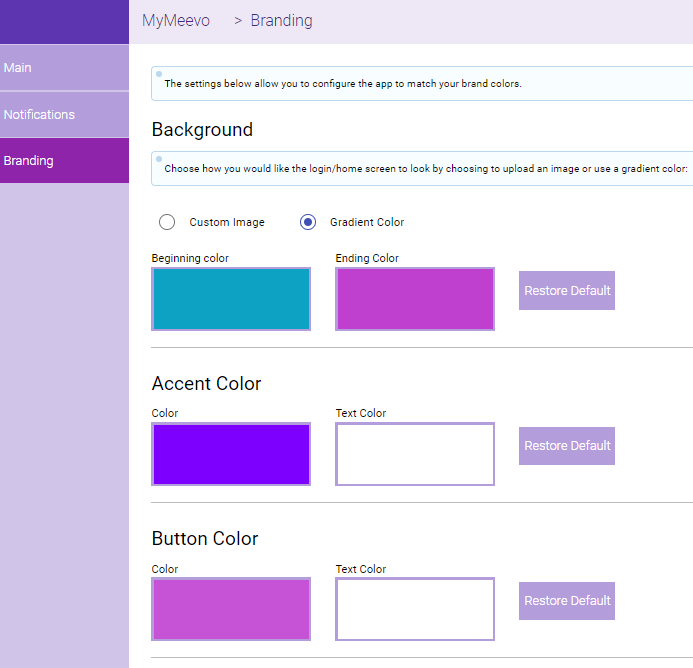
- Background: Styles the Login screen and the Home screen.
- Accent Color: This changes the color of the menu headings (Appointments, Schedule, etc.) and all action buttons (Book button, Add Visit Note, Request Time Off, etc.).
- Button Color: This controls the color of the Login button on the main screen.
Setting up employee access to MyMeevo
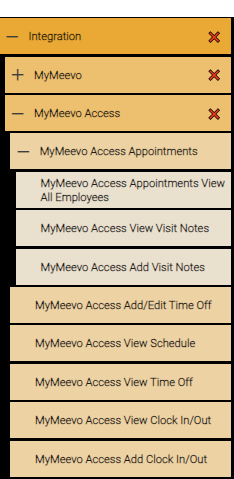
MyMeevo has its own group of security keys that control access to specific features and actions in MyMeevo. MyMeevo keys are set to Deny by default, so you'll need to toggle your desired keys to Grant for the appropriate security roles.
Note: With MyMeevo security, the Hide key functions the same as Deny.
As you configure MyMeevo security, take note of the following:
- Because MyMeevo is an extension of Meevo, MyMeevo honors Meevo's Security Role settings, specifically the Appointment Book keys Add Appointment, Edit Appointment, and Book Add-Ons. The security for these keys will supersede MyMeevo security keys.
- In Security Administration, the MyMeevo security keys control where the employee can go within MyMeevo settings in Meevo, while the MyMeevo Access security keys control what an employee can do within MyMeevo when logged in.
- Employees who are set to Full Access Users in Meevo can use all of the features in MyMeevo, regardless of the Security Role's settings.
- IP Restrictions are honored in MyMeevo and must be configured for employees to be able to clock in and out through MyMeevo. Specifically, you'll want to whitelist your business IP address and map internal to external security roles. This setup ensures that employees can only clock in or out while physically present within your business location.
| MyMeevo Security Key | What It Does | Additional Details |
| MyMeevo Access Appointments | This key controls access to the MyMeevo Appointments tile. | Effectively controls whether the employee can view their own appointments. |
| MyMeevo Access Appointments View All Employees |
Controls access to the Select Employee drop-down within the Appointments tile. |
When an employee has access to the Select Employee drop-down, they will be able to see other employees' appointments on the book. |
| MyMeevo Access View Visit Notes | Allows the employee to view their own Visit Notes on an appointment. | For an employee to view Visit Notes from other employees, they must have Grant access to Meevo key Clients > Visit Notes > View All Employee Notes. |
| MyMeevo Access Add Visit Notes | Allows the employee to add a Visit Note to an appointment. | N/A |
| MyMeevo Security Key | What It Does | Additional Details |
| MyMeevo Access View Schedule | Allows employee to view their schedule. | Setting this key to Grant also grants the employee the ability to submit a schedule change request. |
Clock In/Out
| MyMeevo Security Key | What It Does | Additional Details |
| MyMeevo Access View Clock In/Out | Allows the employee to see their clock actions. | N/A |
| MyMeevo Add Clock In/Out | Allows the employee to add or delete clock actions. | N/A |
Request Time Off
| MyMeevo Security Key | What It Does | Additional Details |
| MyMeevo Access View Time Off | Allows the employee to view their time off history. | N/A |
| MyMeevo Access Add/Edit Time Off | Allows the employee to add or delete clock actions. | N/A |
Selecting which employee notifications to send to MyMeevo
MyMeevo helps improve communication between the front desk and service providers by sending the employee push notifications about today's appointments directly to the app.
More details about MyMeevo push notifications:
- Employee notifications sent to MyMeevo do not count against your text allotment!
- MyMeevo notifications are sent for today's appointments only. For example, an appointment that is booked today for next week will not trigger a notification to MyMeevo, but an appointment that is booked today, for today, will.
- Employees should have Push Notifications enabled for MyMeevo in order to receive notifications. MyMeevo will prompt the employee about this when they first log into MyMeevo.
There are two areas in Meevo where you'll enable MyMeevo notifications:
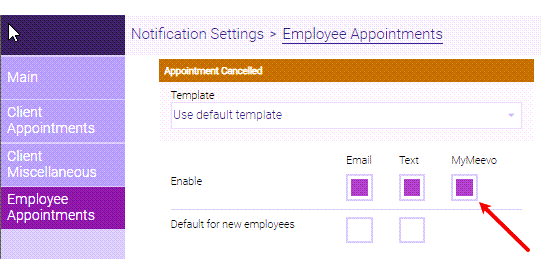
- In Meevo's Notification Settings > Employee Appointments, select the MyMeevo checkbox beside each employee notification that you'd like to send to MyMeevo.
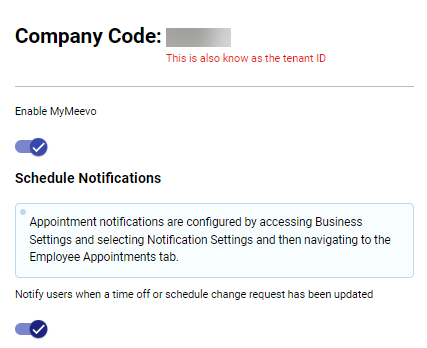
- On the Main tab of MyMeevo settings (Integrations > MyMeevo) is a Scheduled Notification that notifies the employee when one of their requests is updated.
Managing companies in MyMeevo
Some things to know about companies in MyMeevo:
- The Company Code (Tenant ID) in MyMeevo is specific to a company (business) and all locations within that tenant.
- Entering that code into MyMeevo establishes a connection between the app and the business.
- Connected businesses are saved and managed from the MyMeevo Company List.
- MyMeevo allows you to have multiple saved connections in the MyMeevo Company List, but an employee can connect to only one business (company) at a time.
- Most employees will need to connect to only one company (unless they work for multiple businesses). Connecting to a company only needs to be done once, upon initial log-in.
To get to the Company options, tap the hamburger menu from the MyMeevo login screen, making sure you are not logged in.
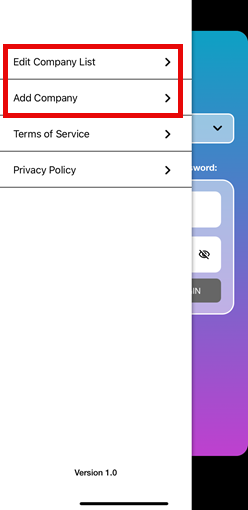
Adding a new company
- Select Add Company. The Please enter Company Code screen appears.
- Enter the Company Code and tap Submit.
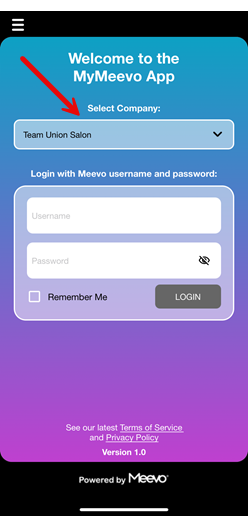
- MyMeevo brings you to the login screen with the newly added business selected in the Select Company drop-down.
Removing a company
These steps remove the connection between MyMeevo and the tenant, including all of its locations.
- Select Edit Company List. The Edit Company List screen appears.
- Select the trash can icon beside the business you wish to remove.
- Select Yes on the confirmation message to remove the business connection.
Connecting to a different company
If there is more than one business connection saved in MyMeevo, a Select Company drop-down appears on the login screen. Multi-location employees can use this drop-down to quickly select another business before logging into MyMeevo.
Related Topics