Online Presence Management Getting Started Checklist
 Verify Your Meevo Business Information
- Make sure the following Meevo Business Information fields are accurate, as this information will be synced to Online Presence Management: your business Name, all Address fields (including Country), Phone Number, Email Address, Facebook URL, Instagram URL, Twitter URL, and Business Hours.
- If your business has a designated store number (this can be the case with multi-location businesses), your store number should not appear in your business's Name field. Instead, make sure that number appears in the Store Number field. If a number is part of your business name, then it is appropriate to leave that number in the name field.
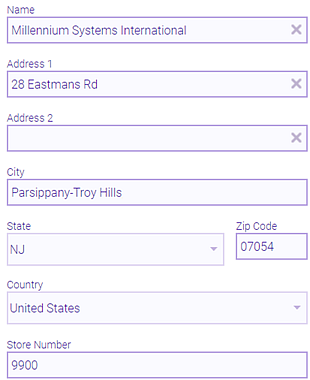
- If your business address uses a suite number, that suite number should appear on Address Line 2, not Address Line 1.
- Make sure your business address for City and Street use appropriate capitalization (first letter of each word only); those addresses should not be in all capital letters.
Review and Decide on a Primary Business Category
- Your business's Primary Category is a very important element of SEO optimization, as it makes sure publishers know how to properly index your business. We highly recommend reading Google's policy on category selection, which you can find in their local business guidelines.
- The Primary Category you'll select should be the broadest classification of your business. The category should complete the statement "This business IS ___" rather than "This business offers ___."
- Once your listings are Live with publishers, you should not change your Primary Category. Take the time now, before setup, to be sure of which you'll select. Later, during Step 3 of setup, you will be able to add additional "secondary" categories to supplement your business's Primary Category.
- If you struggle with finding a Primary Category that perfectly matches your business, select the next closest category now with the knowledge that you will be able to add additional categories a little later.
Prepare to Link to Your Facebook and Google Business Profile Accounts
- You should have your business's Facebook account details ready, including the login information of the personal Facebook account that manages the business Facebook account. The login you use must have administrator access to the Facebook Business page.
- Make sure your Facebook settings are configured as we describe in this article.
- If you do not already have a Facebook Business account, see this Facebook article for tips on creating one.
Google Business Profile
- You should have your business's Google Business Profile account details ready. If you do not already have a Google Business Profile, see Google article for tips on creating one.
Prepare to Link to Your Instagram Account
- OPM syncs to a business's Instagram Location Page, not the Instagram Home Page. An Instagram Location Page gives a user a map marker of where the business is located.
- Your Instagram Location Page gets created automatically by Instagram when an Instagram user takes a picture and geotags it with your business location.
- The geotags that are available to a user in Instagram are directly tied to a specific Facebook Place page. This is so if the Facebook Place page information changes, the Instagram geotag will reflect the changes as well.
- After a Facebook Place page is created for your business, geotags can take up to 2 weeks to be appear in Instagram.
- If you already have a Facebook Place and Instagram Location Page, all historical posts that were tagged with your Instagram geotag will be pulled in once your location is live and publishers are synced.
Consider Additional Business Details
- Step 3 of Getting Started involves entering additional business details in the Knowledge Graph.
- Fields that you should prepare to initially fill out are: Description, Holiday Hours, Hours (Temporarily Closed), Additional Hours Text, Payment Options, Pickup and Delivery Services, and Contact/Website information.
- For more details, see Step 3: Complete the Knowledge Graph.
Getting Started Steps
Before you begin with the steps below, make sure you've reviewed the Getting Started Checklist above and that you have the suggested information in that checklist on-hand.
- Sync Business Information: To start, you'll go into Online Presence Settings and perform a couple of steps that ensure your business information is listed accurately and consistently online.
- Link Online Presence Management to your Facebook and Google Business Profile Accounts: The reason for this step is that these two publishers require you to enter your login credentials in order to integrate with Online Presence Management. Once you link to those platforms, you will be able to manage your Facebook / Google Business Profile information and reviews using Online Presence Management.
- Complete the Knowledge Graph: During this step, you'll enter more details about your business (information that does not come over as part of the sync).
- Monitor Listing Statuses: After you've synced your business information and updated the Knowledge Graph, it will take about 1 to 2 weeks for your listings to go live. The actual time depends on the individual publisher.
- Review Online Listings Management regularly to ensure that listings are going Live as expected and that there aren't any tasks required that could be holding up the process.
- Then, once publishers are live, we recommend collecting about 1 month of data before you spend time analyzing. One month of data should provide a meaningful data set.
Terms to Know
- Entity: The word "entity" is a synonym for "location" in Online Presence Management.
- Insight: In Online Presence Analytics, an "insight" is a specific metric or data point. In Reputation Management, the "Insights" tab provides a number of data points that dive deeper into your reviews.